DIY IoT Lamp Workshop
Leonard Lee
Internet of Things (IoT)
“extend[s] Internet connectivity beyond standard devices, such as desktops, laptops, smartphones and tablets, to any range of traditionally dumb or non-internet-enabled physical devices and everyday objects”
Things Like These:
- speakers
- televisions
- lighting
- thermostats
- kitchen appliances
- vehicles/planes
- fitness equipment
- vending machines/kiosks
- switches/outlets
Why?
Connecting devices to the internet and to each other provide some form of value:
- remote access
- home automation (smart homes)
- cloud integration
- real time monitoring/tracking/notification
Objectives
- build a functional IoT lamp
- experience a hands-on electronics project
- learn about various network protocols
- try Arduino coding
- inspire participants with the possibilities of IoT
Supplies
- IKEA TVÄRS table lamp
- WEMOS/LOLIN D1 Mini (or clone)
- 5V individually addressable RGB LED strip (NeoPixels/WS2811/WS2812(B)/WS2813/SK6812 (mini))
- micro USB cable
- 5V USB power supply
- paper towel/toilet paper cardboard tube
- wires
D1 Mini/ESP8266
The D1 Mini is a development board that uses the ESP8266 microcontroller/SoC to connect to the internet. It is much more powerful than some of the standard Arduino boards, though it has slightly fewer GPIO pins.
Overall, it is a good balance between size, capability, and cost.
What About Raspberry Pi?
- Raspberry Pi (and other Single Board Computers) are full fledged computers that run an OS and can run multiple programs.
- The D1 Mini (and other Arduino compatible boards) are microcontrollers that run 1 program at a time.
- While the Pi is (waaay) more powerful and can do more, it also takes longer to boot up, is bigger, is more sensitive to power outages, and costs more--basically overkill for a project like this.
Preparing the IDE
- install CH340G driver
- install the Arduino IDE
- Preferences > add an Additional Boards Manager URL:
http://arduino.esp8266.com/stable/package_esp8266com_index.json - Tools > Board > Boards Manager... > esp8266 > Install
- Tools > Board > ESP8266 Modules > LOLIN(WEMOS) D1 R2 & Mini
Upload Your First Sketch
- connect the D1 mini to your computer using the micro USB cable
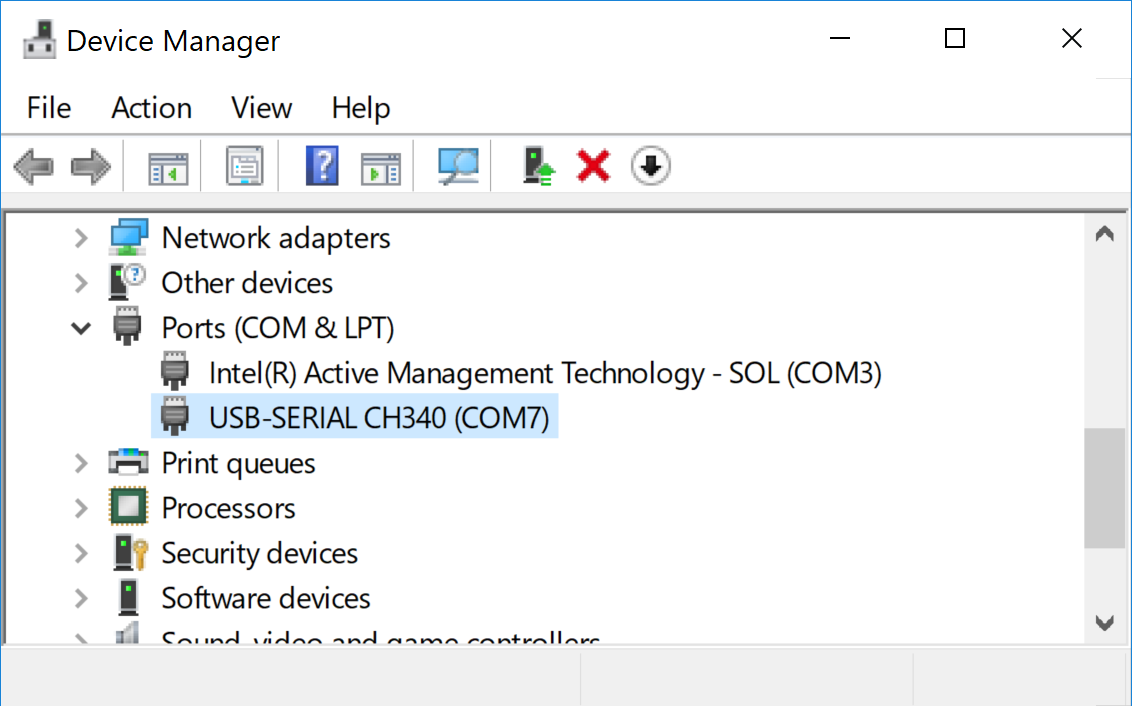
- select the correct COM port under Tools > Port
- open the Blink example sketch under File > Examples > ESP8266 > Blink
- click on the Upload icon at the top (or CTRL+U/⌘+U)
- After the sketch is successfully uploaded, the blue LED on the D1 Mini should start blinking! This is the Hello World of electronics.
Blink: What's Happening in setup() and loop()
void setup() {
  pinMode(LED_BUILTIN, OUTPUT);     // Initialize the LED_BUILTIN pin as an output
}

void loop() {
  digitalWrite(LED_BUILTIN, LOW);   // Turn the LED on (Note that LOW is the voltage level
  delay(1000);                      // Wait for a second
  digitalWrite(LED_BUILTIN, HIGH);  // Turn the LED off by making the voltage HIGH
  delay(2000);                      // Wait for two seconds (to demonstrate the active low LED)
}
File > Examples > ESP8266 > Blink
The Problem with delay()
delay() is a blocking function that pauses execution until a certain amount of time has passed. During this time, it brings most other activity to a halt (the ESP8266 has a single core). This is problematic for any device which needs to react quickly to user input or other events.
Blink Without Delay
Solves the problem by only executing code after a certain amount of time has passed.
int ledState = LOW;

unsigned long previousMillis = 0;
const long interval = 1000;

void setup() {
  pinMode(LED_BUILTIN, OUTPUT);
}

void loop() {
  unsigned long currentMillis = millis();
  if (currentMillis - previousMillis >= interval) {
    previousMillis = currentMillis;
    if (ledState == LOW) {
      ledState = HIGH;  // Note that this switches the LED *off*
    } else {
      ledState = LOW;  // Note that this switches the LED *on*
    }
    digitalWrite(LED_BUILTIN, ledState);
  }
}
File > Examples > ESP8266 > BlinkWithoutDelay
Serial Monitor
The Serial Monitor can be used to display text from the microcontroller for debugging purposes.
Tools > Serial Monitor (or Ctrl+Shift+M/⌘+Shift+U)
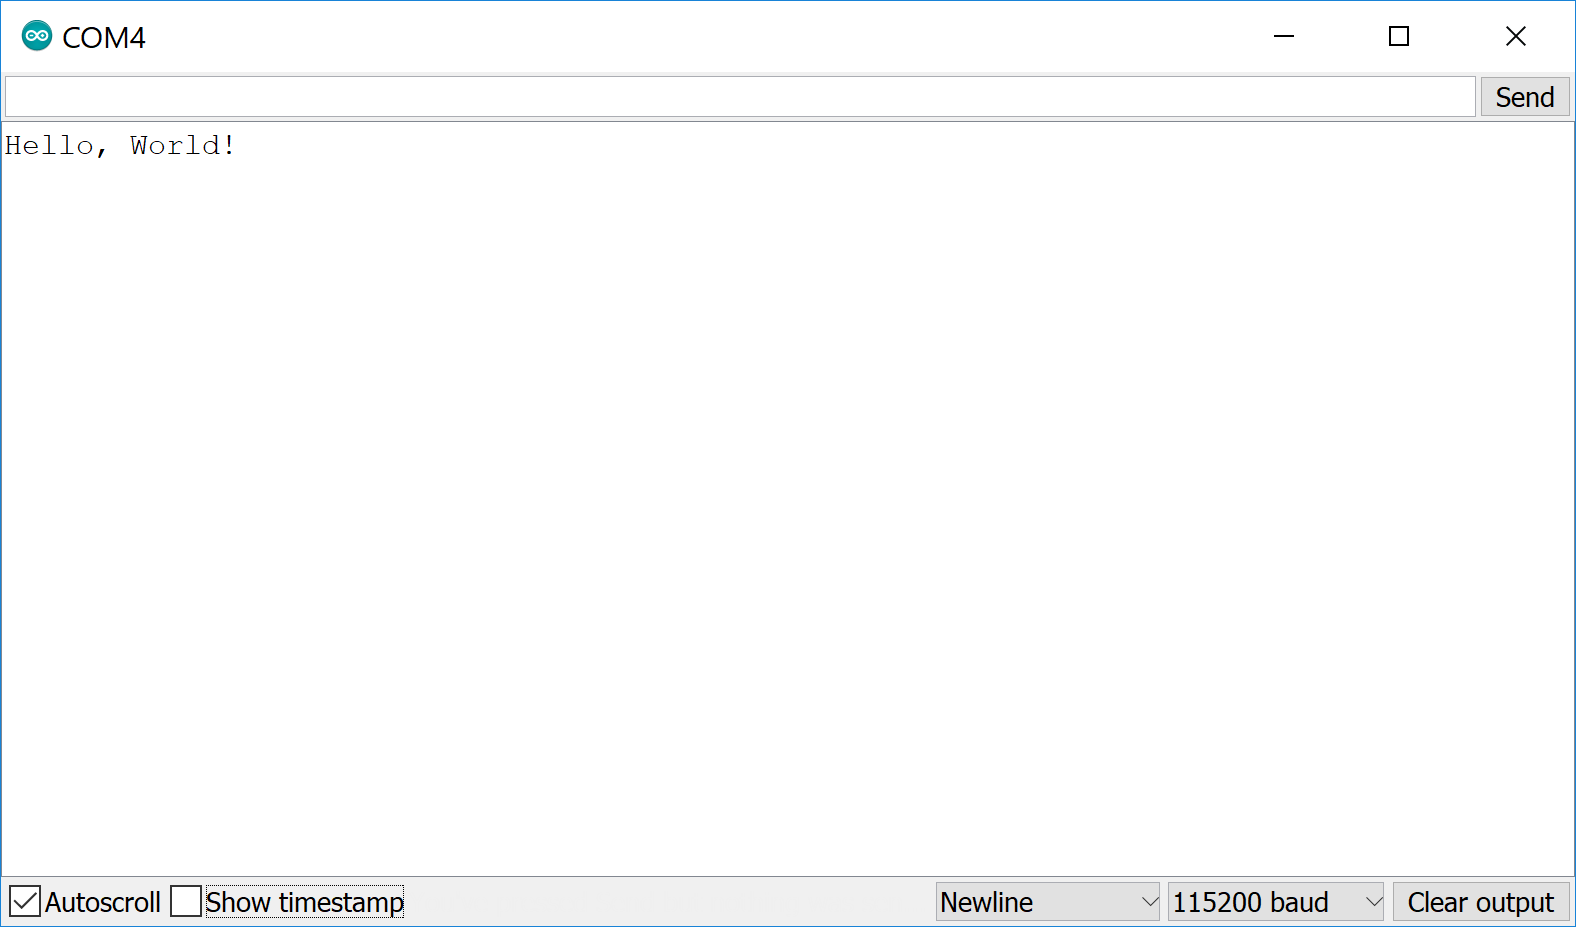
Software Hello World
- Set the baud rate on the Serial Monitor to match the above
Serial.begin()call (115200) - Add the following to the beginning of the
setup()function:
  Serial.begin(115200);
  Serial.println("");
Serial.println("Hello, World!");WS2812B/NeoPixel LED Strips
- Individually addressable: each LED can be a different color/brightness at the same time
- Run on 5V DC, same as what is provided by USB
- LED density from 30-144 LEDs/m
- Some strips are weather/water proof (IP 6X rated) at the cost of a few mm of thickness
- Arrows indicate the direction of data flow
- Can be cut along the copper pads
- Adhesive backing (usually terrible)
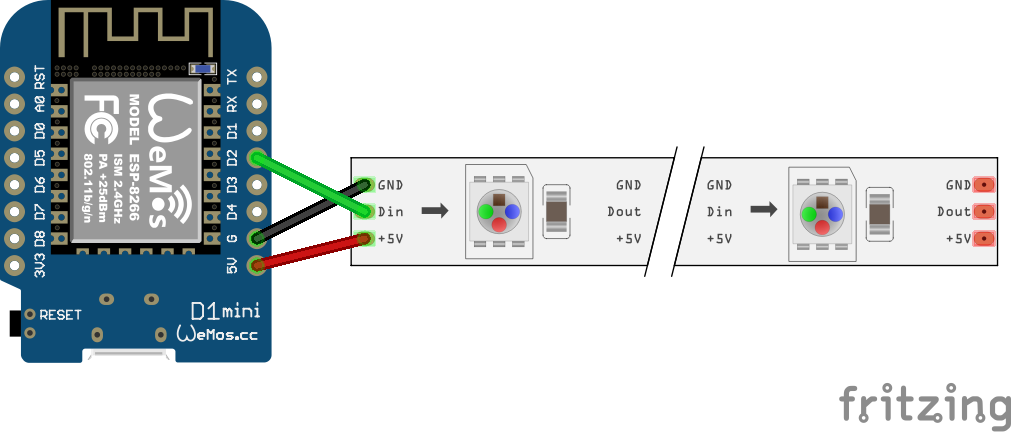
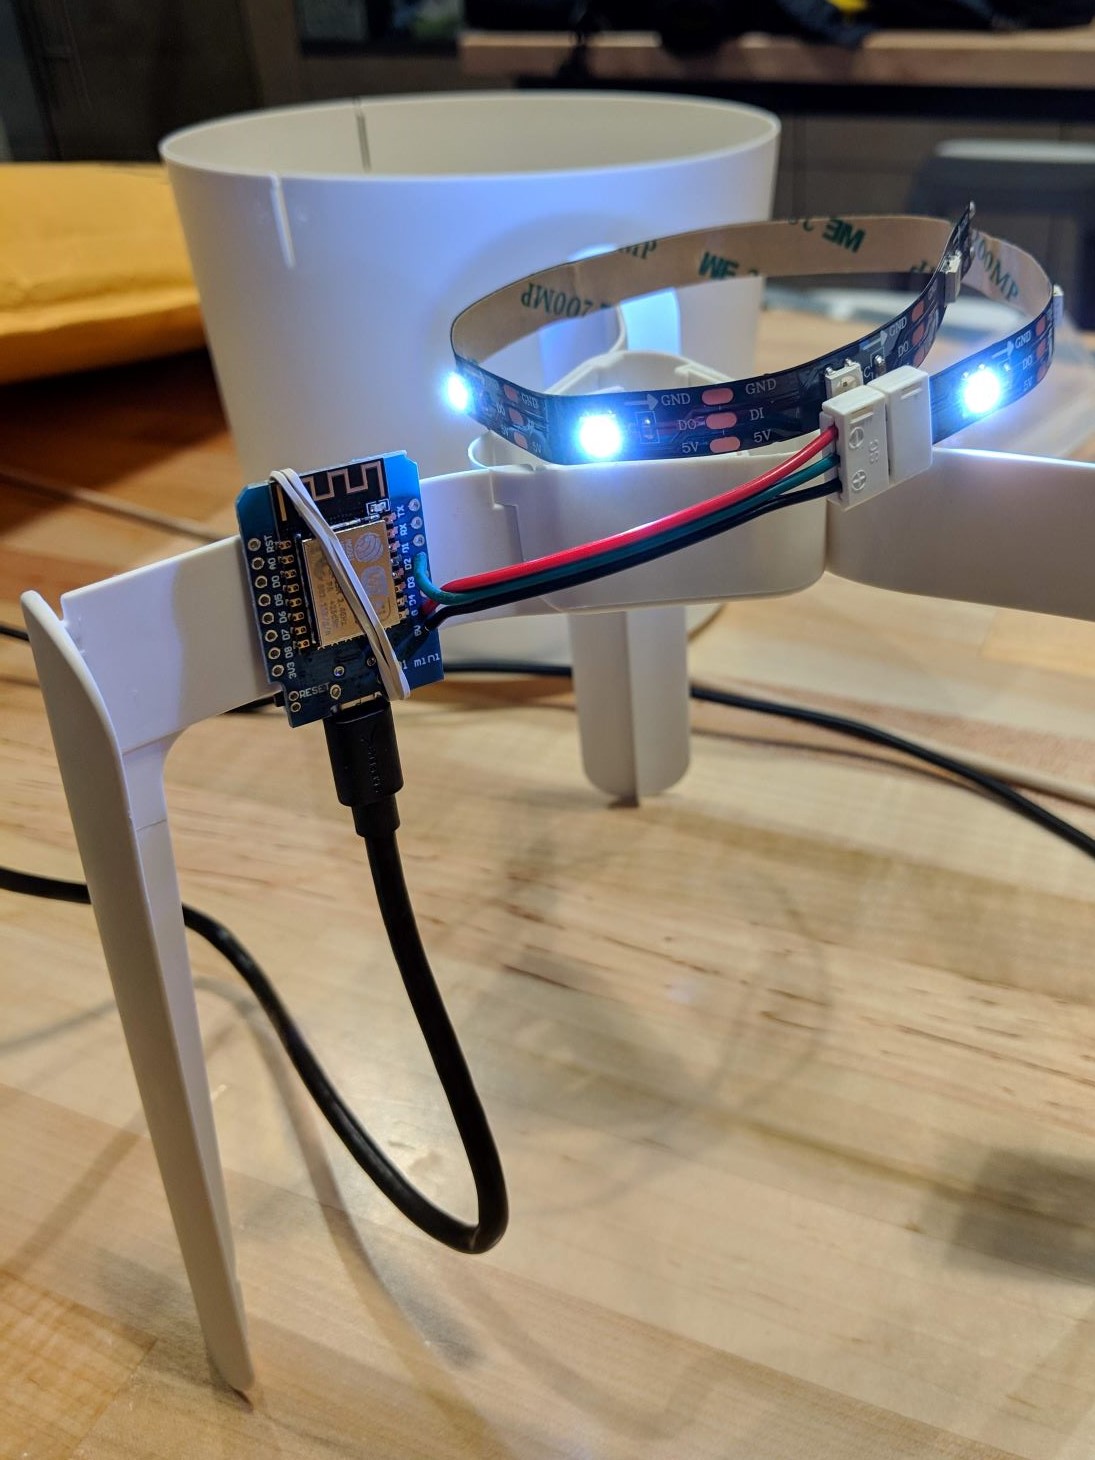
Wiring Time
Connect the LED strip to the D1 mini by soldering three wires:
⚠️ Ask for help if you are unable to solder the connections yourself! ⚠️
| D1 mini | LED strip |
|---|---|
| D2 | DI/DIN |
| G/GND | GND/- |
| 5V | 5V/+5V/VCC/+ |
Wiring Diagram
⚠️ Your LED strip's connection leads may not be in the same order! Check the labels! ⚠️
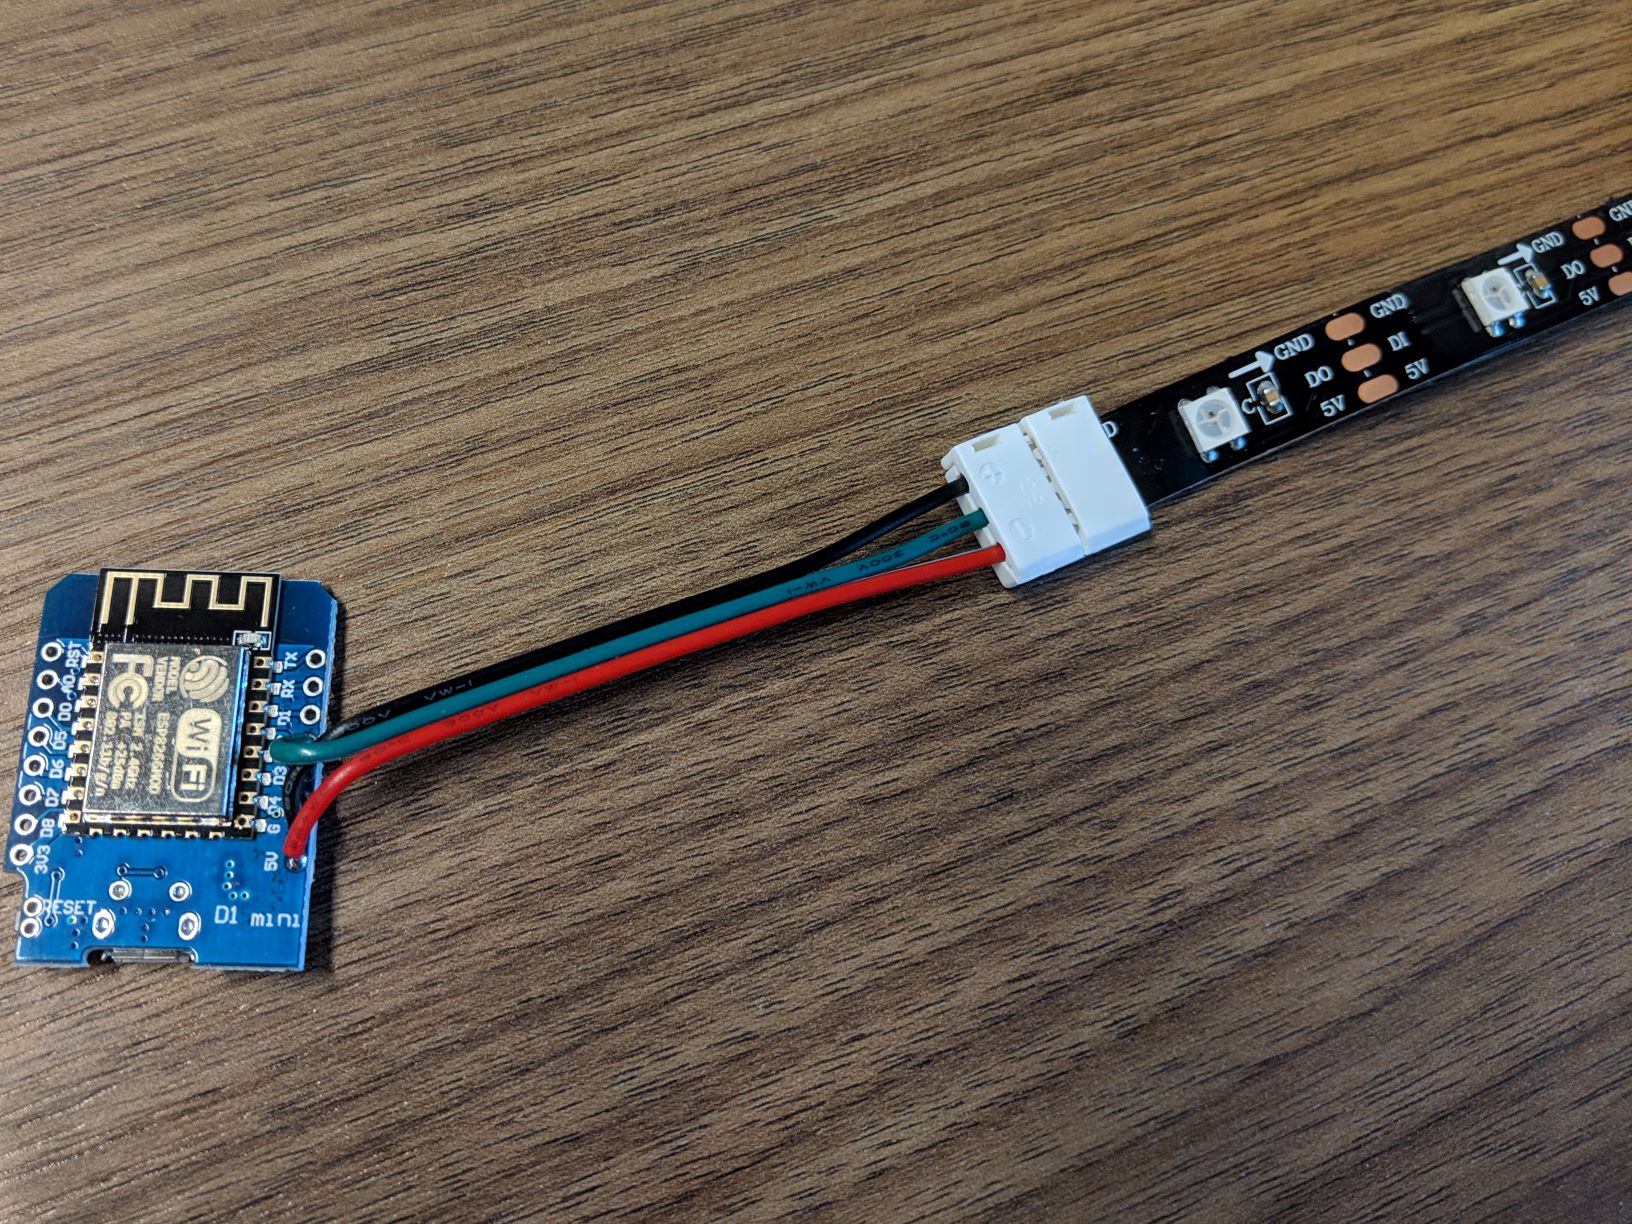
using an LED strip connector... note the arrow direction
A Note About Level Shifting
D2 pin connects directly to the strip's data input ("DI"/"DIN"). D2's output voltage is 3.3V and DI expects 5V*--but we are hoping to avoid level shifting as long as it works to keep things simple.
* According to the WS2812B datasheet, the minimum voltage for highs on the data input signal ought to be 0.7×VDD or 3.5V with a 5V power supply. However, this setup still works because it's close enough? ¯\_(ツ)_/¯ You can try to avoid flickering issues by using a power supply that is no greater than 5V (some go to 5.25V).
Reading a Power Supply
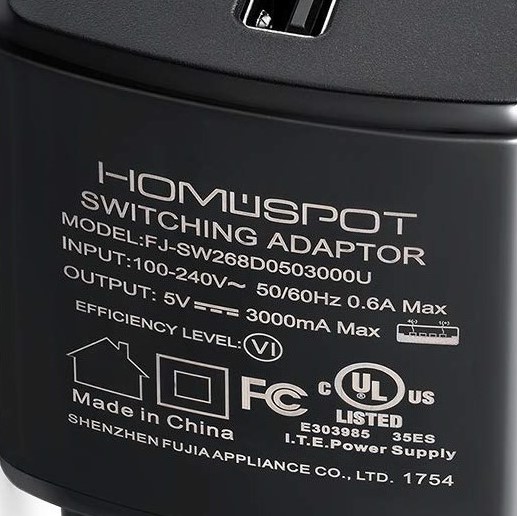
INPUT
∿ Alternating Current
100-240V
OUTPUT
⎓ Direct Current
5V
3000 mA
Switching (vs Transformer)
⚡ Power Requirements ⚡
- Each LED can draw up to 60 mA at maximum brightness white.
- The D1 mini can also draw up to 250 mA.
- Some computer USB ports can only supply 500 mA. Therefore, avoid setting the LEDs to max brightness or limit the number of LEDs lit at the same time.
- The D1 mini also has a 500 mA fuse for the 5V pin. To support more LEDs, you should bypass powering the LEDs through the 5V pin (more on this later).
- ⌊(supply-250)/60⌋ = # of max brightness LEDs
FastLED Library
- Libraries are packages of code that can provide extra functionality for your sketches. Don't reinvent the wheel.
FastLED is a fast, efficient, easy-to-use Arduino library for programming addressable LED strips and pixels
- Support for HSV color model
- Installation: Tools > Manage Libraries... > FastLED > Install
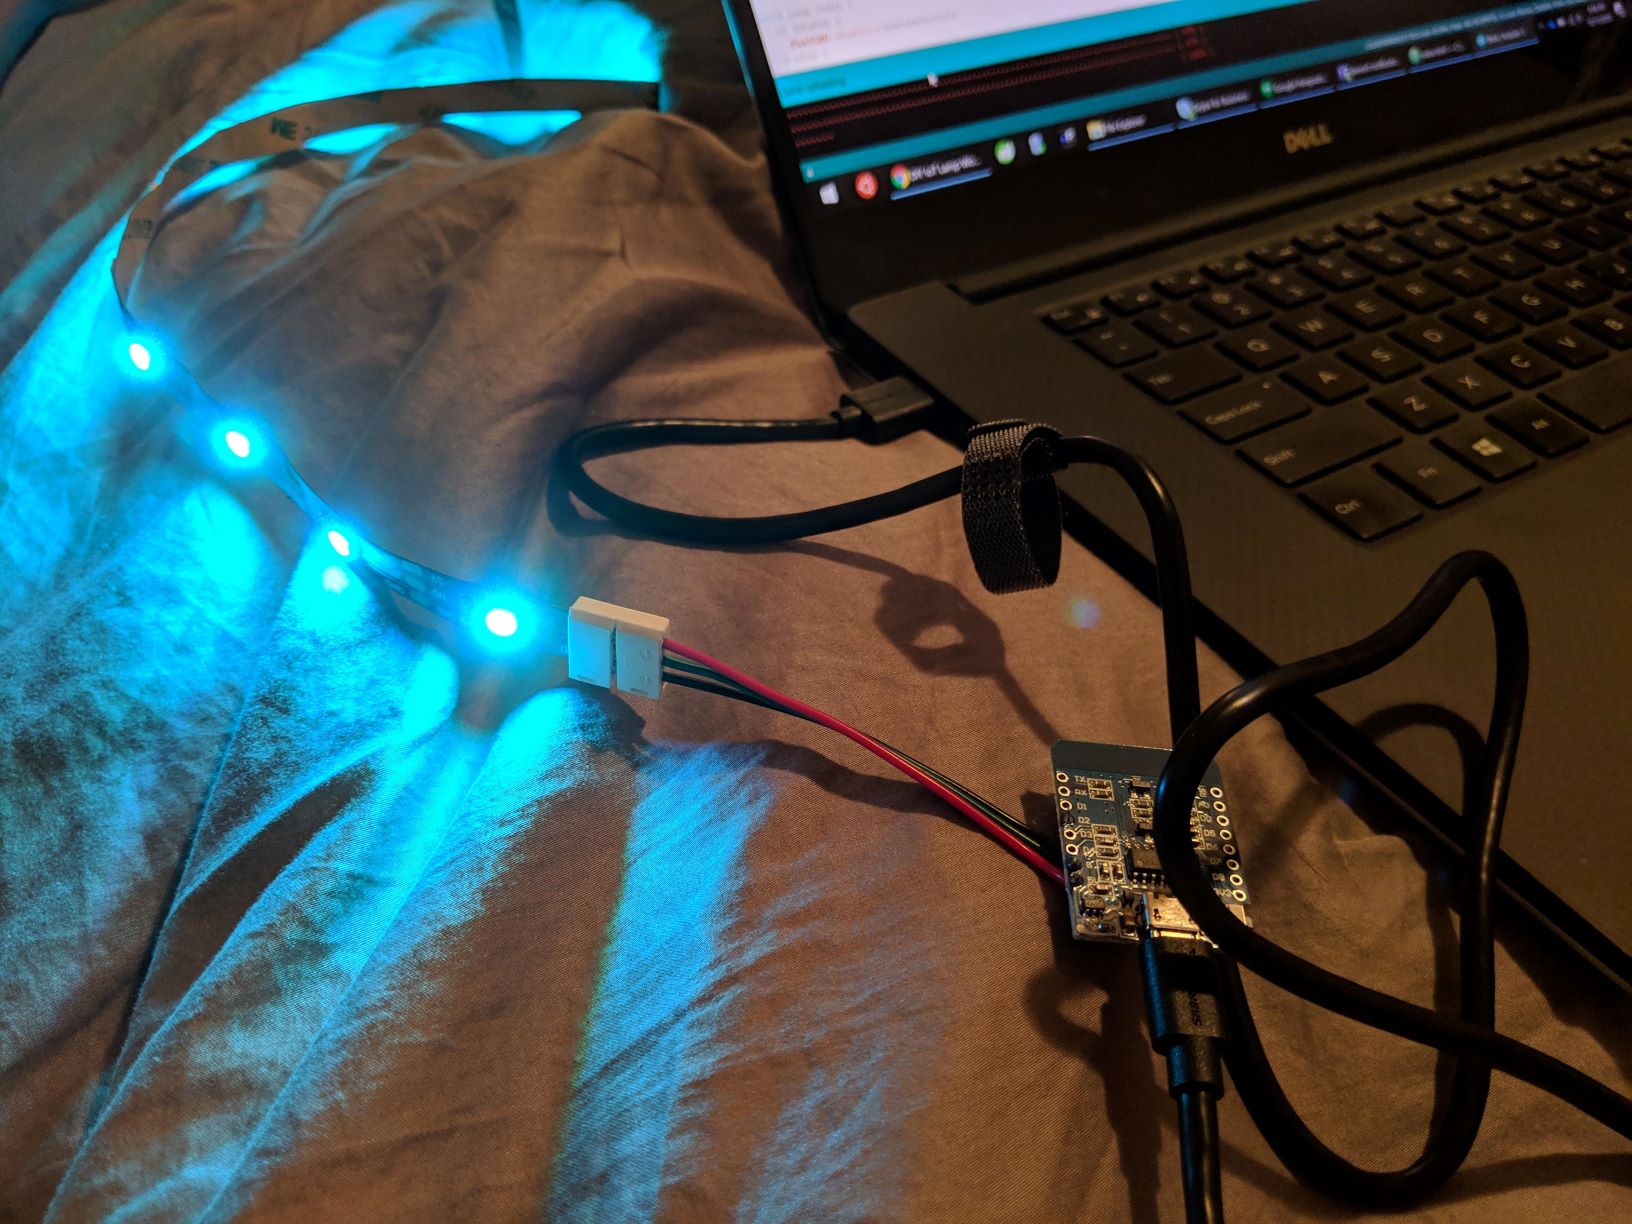
FastLED Blink
After loading the FastLED Blink example, remove the commented out code and set DATA_PIN to our data pin and NUM_LEDS to the number of LEDs in the strip:
#include <FastLED.h>

#define NUM_LEDS 10    // number of LEDs in the strip/ring
#define DATA_PIN D2    // the GPIO pin for the LEDs' data

// Define the array of leds
CRGB leds[NUM_LEDS];

void setup() {
  FastLED.addLeds<NEOPIXEL, DATA_PIN>(leds, NUM_LEDS);
}

void loop() {
  // Turn the LED on, then pause
  leds[0] = CRGB::Red;
  FastLED.show();
  delay(500);
  // Now turn the LED off, then pause
  leds[0] = CRGB::Black;
  FastLED.show();
  delay(500);
}
File > Examples > FastLED > Blink
Remove delay()... Again
This time, we get to use FastLED's EVERY_N_MILLISECONDS function*! Replace the loop() function with the following:
void loop() {
  EVERY_N_MILLISECONDS(500) {
    if (leds[0].r == 0) {
      leds[0] = CRGB::Red;   // Turn the LED on
    } else {
      leds[0] = CRGB::Black; // Turn the LED off
    }
    FastLED.show();
  }
}
* actually a preprocessor function-like macro
Now For Something Useful
That blinking program was a good exercise, but we won't need to use EVERY_N_MILLISECONDS until later. Instead, let's work on making the LEDs light up with the color that we specify.
First, add global variables under the #include <FastLED.h> line, which will keep track of the current state:
// state
unsigned int hue = 180;   // hue state (0-359)
uint8_t saturation = 100; // saturation state (0-100)
uint8_t value = 50;       // value/brightness state (0-100)
boolean state = true;     // on/off state (true = "ON", false = "OFF")
char effect[10] = "none"; // "none" | "colorloop" | "trail"
const char* on_state = "ON";
const char* off_state = "OFF";
Next, add a global variable currentColor under the declaration for leds near the top:
CRGB leds[NUM_LEDS];
CHSV currentColor = CHSV(hue * 255 / 359, saturation * 255 / 100, value * 255 / 100);
Finally, we'll need to replace the loop() function with:
void loop() {
  // LED
  loop_led();
}

void loop_led() {
  if (state) {
    FastLED.showColor(currentColor);
  } else {
    FastLED.clear(true); // turn off all LEDs
  }
}
Changing the Color
Try setting the hue variable near the top to 0.
unsigned int hue = 0; // hue state (0-359)What about lowering the value variable to 25?
uint8_t value = 25; // value/brightness state (0-100)Color changes made during compile time work, but run time changes are preferred.
💾 Save Your Work 💾
This is a good point to save your sketch. The Blink example which we have based our work on so far is read only, so it will prompt you to save your sketch to a new location when using File > Save.
With the default preferences, the sketch will be automatically saved on each compile/upload going forward.
Connecting to WiFi
Let's start to add some WiFi capabilities. Our first task is to set up WiFiManager, which will make it unnecessary to hardcode our WiFi connection info.
Start by installing the WiFiManager library (Tools > Manage Libraries... > WiFiManager > Install)
Then, add the following includes at the top, near the FastLED.h include:
#include <ESP8266WiFi.h>
#include <DNSServer.h>
#include <ESP8266WebServer.h>
#include <WiFiManager.h>
(some of these libraries are installed as part of the ESP8266 board)
Next, add a global wifiManager variable above the setup() function:
// WiFi
WiFiManager wifiManager;
Finally, replace the setup() function with:
/**
Unique identifer used for wifi hostname, AP SSID, MQTT ClientId, etc.
*/
#define ID_PREFIX "LIGHT-"
String getIdentifier() {
// the ESP8266's chip ID is probably unique enough for our purposes
// see: https://bbs.espressif.com/viewtopic.php?t=1303
// see: https://github.com/esp8266/Arduino/issues/921
String chipId = String(ESP.getChipId(), HEX);
chipId.toUpperCase();
return ID_PREFIX + chipId;
}
void setup() {
Serial.begin(115200);
Serial.println();
// LED
FastLED.addLeds<NEOPIXEL, DATA_PIN>(leds, NUM_LEDS);
// WiFi
WiFi.hostname(getIdentifier().c_str());
wifiManager.autoConnect(getIdentifier().c_str());
Serial.printf("WiFi IP Address: %s\n", WiFi.localIP().toString().c_str());
Serial.printf("WiFi Hostname: %s\n", WiFi.hostname().c_str());
Serial.printf("WiFi MAC addr: %s\n", WiFi.macAddress().c_str());
Serial.printf("WiFi SSID: %s\n", WiFi.SSID().c_str());
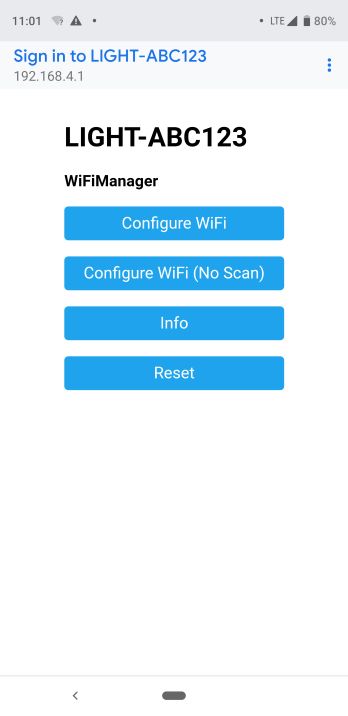
}After uploading the code, tell the D1 mini which network to connect to:
- In the Serial Monitor, look for a line that indicates the access point name:
*WM: Configuring access point...
*WM: LIGHT-ABC123
- On your phone or laptop, look for an open network that matches (e.g., LIGHT-ABC123) and connect to it.
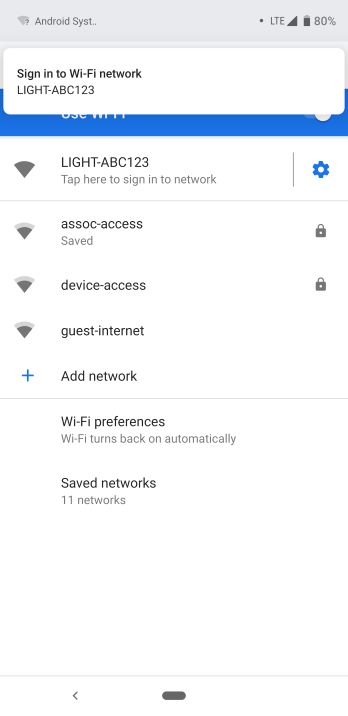
Once connected, you should see a prompt to sign in (e.g., "Tap here to sign in to network"). Otherwise, open http://192.168.4.1 in a browser.
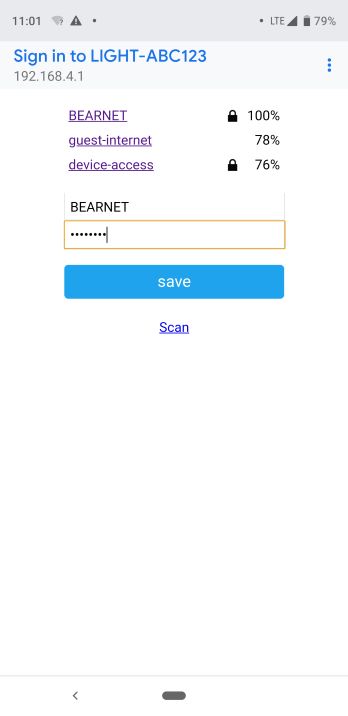
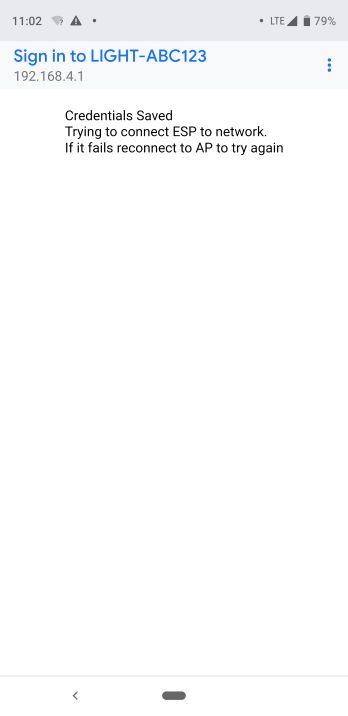
Select your network and provide the credentials
After the D1 mini restarts, verify connectivity to the network by checking for an assigned IP address in the Serial Monitor:
*WM:
*WM: AutoConnect
*WM: Connecting as wifi client...
*WM: Using last saved values, should be faster
*WM: Connection result:
*WM: 3
*WM: IP Address:
*WM: 192.168.1.206
WiFi IP Address: 192.168.1.206
WiFi Hostname: LIGHT-ABC123
JSON payload
Let's define the kinds of messages we will be sending back and forth with our WiFi connected device. JSON is a standard, compact, yet human-readable format:
{
  "state" : "ON",
  "brightness" : 100,
  "color" : {
    "h" : 0,
    "s" : 100
  },
  "effect" : "none"
}
used to describe the current state and to request a change, regardless of protocol
Optional Fields
When requesting a change, you can omit fields that are not required. This allows requests to be transmitted quicker and avoids unnecessary processing.
{"brightness":25}whitespace outside of double quotes is ignored
ArduinoJson Library
We will be using the ArduinoJson library to work with JSON in our program.
After installing the latest 5.x version of the libary via the Library Manager (Tools > Manage Libraries...), add this include to the top:
#include <ArduinoJson.h>⚠️ ArduinoJson 6.x is installed by default, but it is still in beta! ⚠️
HTTP server
We will set up an HTTP server to handle incoming requests to either query for the current state or change the current state.
First, we need to add a global variable for our HTTP server. You can put this under the "WiFi" section of global variables:
// HTTP server
#define HTTP_SERVER_PORT 80
ESP8266WebServer server(HTTP_SERVER_PORT);
Next, add the following to the end of the setup() function, after the "WiFi" section:
  // HTTP server
  server.on("/hello", HTTP_GET, []() {
    server.send(200, "text/plain", "Hello, World!");
  });
  server.on("/light", HTTP_GET, []() {
    server.send(200, "application/json", getStateJson());
  });
  server.on("/light", HTTP_PUT, []() {
    if (!server.hasArg("plain")) {
      server.send(400, "text/plain", "missing body on request");
      return;
    }

    handleJsonPayload(server.arg("plain").c_str());
    server.send(204);
  });
  server.begin();
  Serial.printf("HTTP server started on port %d\n", HTTP_SERVER_PORT);
Each on() call defines how incoming HTTP requests are handled.
We need to add this to the the main loop() function (can go at the beginning before the "LED" section):
  // HTTP
  server.handleClient();
This makes it so that on each pass of the loop, we handle any new incoming HTTP requests.
Add the getStateJson() function before the setup() function:
/**
   return a JSON string representation of the current state
*/
String getStateJson() {
  // code partially generated using https://arduinojson.org/v5/assistant/
  const size_t bufferSize = JSON_OBJECT_SIZE(2) + JSON_OBJECT_SIZE(5);
  DynamicJsonBuffer jsonBuffer(bufferSize);
  JsonObject& root = jsonBuffer.createObject();
  root["id"] = getIdentifier();
  root["brightness"] = value;
  root["state"] = state ? on_state : off_state;
  root["effect"] = effect;
  JsonObject& color = root.createNestedObject("color");
  color["h"] = hue;
  color["s"] = saturation;

  String jsonString;
  root.printTo(jsonString);
  return jsonString;
}
We'll come back to this... for now, let's just paste this function at the bottom so that it can compile while uploading:
void handleJsonPayload(const char* payload) {
  // TODO actually handle the payload and not just print it out
  Serial.println(payload);
}
HTTP Tests Using cURL
curl is a command line tool that can be used to make HTTP requests.
Connect to the same network as the microcontroller. Then, using the IP address printed out in the Serial Monitor, run the following in a Command Prompt/Terminal/shell:
curl http://192.168.1.206/helloYou should see the following text:
Hello, World!Now let's hit a URL that gets the current state:
curl http://192.168.1.206/lightYou should see a JSON response which describes the current state variables.
{"id":"LIGHT-ABC123","brightness":50,"state":"ON","effect":"none","color":{"h":180,"s":100}}Let's max out the brightness with a PUT request:
curl -X PUT -H "Content-Type:application/json" -d "{\"brightness\":100}" http://192.168.1.206/lightYou should see the JSON that was the "data" parameter printed out in the Serial Monitor...
{"brightness":100}
Now that we have confirmed that handleJsonPayload() is working, let's actually implement it to affect our state variables.
Replace the handleJsonPayload() function with the following:
/*
  sets the hue state; an update will not be triggered until updateColor() is called
*/
void setHue(int h) {
  hue = h % 360;
}

/*
   sets the saturation state; an update will not be triggered until updateColor() is called
*/
void setSaturation(int s) {
  saturation = constrain(s, 0, 100);
}

/*
  sets the value state; an update will not be triggered until updateColor() is called
*/
void setBrightness(int brightness) {
  value = constrain(brightness, 0, 100);
}

/**
   Sets the toColor using a FastLED CHSV object based on the current color state, which requires converting traditional HSV scales to FastLED's 0-255
   see: https://github.com/FastLED/FastLED/wiki/FastLED-HSV-Colors#numeric-range-differences-everything-here-is-0-255
*/
void updateColor() {
  setColor(CHSV(hue * 255 / 359, saturation * 255 / 100, value * 255 / 100));
}

/**
   sets the toColor using a FastLED CHSV object; the fromColor is set to the currentColor
*/
void setColor(CHSV toChsv) {
  Serial.printf("setting color to CHSV(%d,%d,%d)\n", toChsv.h, toChsv.s, toChsv.v);

  currentColor = toChsv;
}

/**
  returns true if the given effect string is non-empty, one of the valid effect values, and different from the current state's effect; false otherwise
*/
bool isValidAndDifferentEffect(const char *ef) {
  return ef && (strcmp(ef, "none") == 0 || strcmp(ef, "colorloop") == 0 || strcmp(ef, "trail") == 0) && strcmp(ef, effect) != 0;
}

/**
   Processes the given JSON string, making any state changes as necessary.
*/
void handleJsonPayload(const char* payload) {
  // (somewhat) adheres to Home Assistant's MQTT JSON Light format (https://www.home-assistant.io/components/light.mqtt_json/)
  // code partially generated using https://arduinojson.org/v5/assistant/
  const size_t bufferSize = JSON_OBJECT_SIZE(2) + JSON_OBJECT_SIZE(4);
  DynamicJsonBuffer jsonBuffer(bufferSize);
  JsonObject& root = jsonBuffer.parseObject(payload);

  // state
  const char* stateJson = root["state"]; // "ON" or "OFF"
  if (stateJson) {
    if (!state && strcmp(stateJson, on_state) == 0) {
      state = true;
    } else if (state && strcmp(stateJson, off_state) == 0) {
      state = false;
    }
  }

  // effect
  const char* effectJson = root["effect"];
  if (isValidAndDifferentEffect(effectJson)) {
    strcpy(effect, effectJson);
  }

  // color
  bool colorChanged = false;
  JsonVariant hueJson = root["color"]["h"];        // 0 to 359
  if (hueJson.success() && hue != hueJson.as<int>()) {
    setHue(hueJson.as<int>());
    colorChanged = true;
  }
  JsonVariant saturationJson = root["color"]["s"]; // 0 to 100
  if (saturationJson.success() && saturation != saturationJson.as<int>()) {
    setSaturation(saturationJson.as<int>());
    colorChanged = true;
  }
  JsonVariant brightness = root["brightness"];     // 0 to 100
  if (brightness.success() && value != brightness.as<int>()) {
    setBrightness(brightness.as<int>());
    colorChanged = true;
  }
  if (colorChanged) {
    updateColor();
  }
}
Max Brightness
Upload the sketch and try that same max brightness PUT request again:
curl -X PUT -H "Content-Type:application/json" -d "{\"brightness\":100}" http://192.168.1.206/light😎
Other Curl Commands To Try
curl -X PUT -H "Content-Type:application/json" -d "{\"state\":\"OFF\"}" http://192.168.1.206/lightturn off the light, turn off the light
- Nelly Furtado
curl -X PUT -H "Content-Type:application/json" -d "{\"state\":\"ON\"}" http://192.168.1.206/lightjust gimme the light
- Sean Paul
curl -X PUT -H "Content-Type:application/json" -d "{\"color\":{\"h\":0,\"s\":100},\"brightness\":50}" http://192.168.1.206/light(Roxanne) put on the red light
- The Police
curl -X PUT -H "Content-Type:application/json" -d "{\"color\":{\"s\":0},\"brightness\":50}" http://192.168.1.206/lightall of the lights, all of the lights
- Ye
Time To Build A Webpage
The curl command line tool has successfully demonstrated remote control of our LEDs. However, we probably want a more user-friendly way of interacting with our server using a browser.
Create an HTML File
- Sketch > Show Sketch Folder
- Create a new folder/directory named
data - Inside of
data, create a new file namedindex.htmlwith the following contents:<!DOCTYPE html> <html> <head> <meta charset="UTF-8"> <title>Hello</title> </head> <body> Hello, World! </body> </html>
SPIFFS
SPIFFS is a file system that we can use to store persistent data. We will use it to store static web content (HTML, CSS, JS) to be served by the webserver.
It can also be used to store other data. For example, a JSON representation of the current state.
Arduino ESP8266 filesystem uploader
- follow the instructions at Arduino ESP8266 filesystem uploader's github page to download and install the plugin
- The D1 mini has a 4M flash chip and the file system can be configured to be 1M, 2M, or 3M. We will configure it to use 1M to allow more memory for the sketch, OTA, etc.: Tools > Flash Size > 4M (1M SPIFFS)
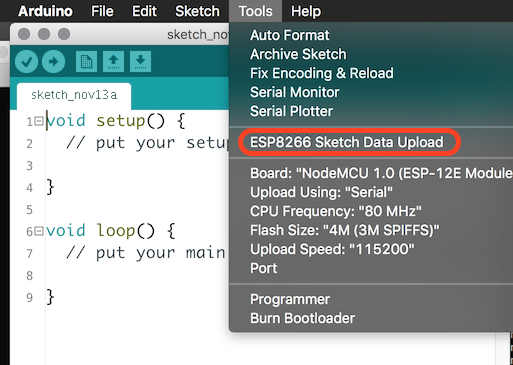
Upload Data to SPIFFS
- before uploading data, close the Serial Monitor window
- Tools > ESP8266 Sketch Data Upload
Changes to serve up the file on requests to "/":
-
Add the following include:
#include <FS.h> -
Add the following line in the
setup()function before the calls toserver.on():server.serveStatic("/", SPIFFS, "/index.html"); // handle root requests -
Add the following to the beginning of the
setup()function:SPIFFS.begin();
After uploading, you should now be able to view the webpage on a browser:
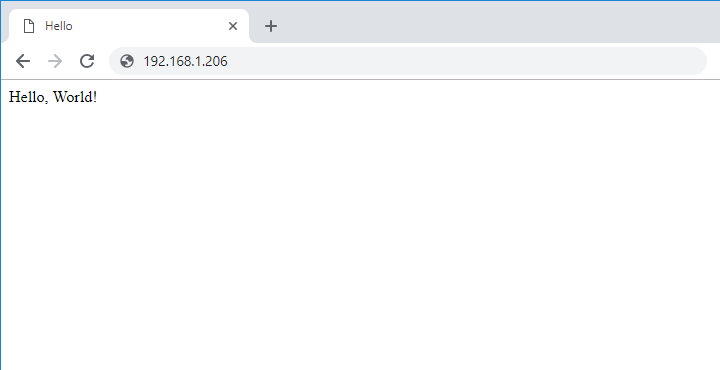
Now let's modify index.html to have something more useful and re-upload (Tools > ESP8266 Sketch Data Upload):
<!DOCTYPE html>
<html lange="en">
<head>
<meta charset="utf-8">
<title></title>
<meta name="viewport" content="width=device-width, initial-scale=1, shrink-to-fit=no">
<link rel="stylesheet" href="https://stackpath.bootstrapcdn.com/bootstrap/4.1.3/css/bootstrap.min.css" integrity="sha384-MCw98/SFnGE8fJT3GXwEOngsV7Zt27NXFoaoApmYm81iuXoPkFOJwJ8ERdknLPMO" crossorigin="anonymous">
<link rel="stylesheet" href="https://use.fontawesome.com/releases/v5.5.0/css/all.css" integrity="sha384-B4dIYHKNBt8Bc12p+WXckhzcICo0wtJAoU8YZTY5qE0Id1GSseTk6S+L3BlXeVIU" crossorigin="anonymous">
<style>
input[type="range"] {
	-webkit-appearance: none;
	border-radius: .25rem;
	padding: 0.375rem 0;
}
input[type=range]::-moz-range-track {
	background: transparent;
}
</style>
</head>
<body>
<!-- header -->
<header>
  <nav class="navbar navbar-expand-md navbar-dark bg-dark">
	<span class="navbar-brand"></span>
  </nav>
</header>

<!-- content -->
<div role="main" class="container mt-3">
	<form>
		<div class="form-group form-inline">
			<label class="col-sm-1 col-form-label"><i class="fas fa-power-off" aria-hidden title="Power"></i><span class="sr-only">Power:</span></label>
			<div class="col-sm-11">
				<div class="btn-group btn-group-toggle d-flex" data-toggle="buttons">
					<label class="btn btn-primary w-100">
						<input type="radio" name="state" autocomplete="off" value="ON">ON
					</label>
					<label class="btn btn-primary w-100">
						<input type="radio" name="state" autocomplete="off" value="OFF">OFF
					</label>
				</div>
			</div>
		</div>
		<div class="form-group form-inline">
			<label for="valrange" class="col-sm-1 col-form-label"><i class="fas fa-sun" aria-hidden title="Brightness"></i><span class="sr-only">Brightness:</span></label>
			<div class="col-sm-11">
				<input type="range" min="0" max="100" value="50" class="form-control-range" id="valrange" title="brightness">
			</div>
		</div>
		<div class="form-group form-inline">
			<label for="huerange" class="col-sm-1 col-form-label"><i class="fas fa-palette" aria-hidden title="Color"></i><span class="sr-only">Color:</span></label>
			<div class="col-sm-11">
				<input type="range" min="0" max="359" value="180" class="form-control-range" id="huerange" title="hue">
				<input type="range" min="0" max="100" value="100" class="form-control-range mt-2" id="satrange" title="saturation">
			</div>
		</div>
		<div class="form-group form-inline">
			<label class="col-sm-1 col-form-label"><i class="fas fa-magic" aria-hidden title="Effect"></i><span class="sr-only">Effect:</span></label>
			<div class="col-sm-11">
				<div class="btn-group btn-group-toggle d-flex" data-toggle="buttons">
					<label class="btn btn-primary w-100">
						<input type="radio" name="effect" autocomplete="off" value="none">none
					</label>
					<label class="btn btn-primary w-100">
						<input type="radio" name="effect" autocomplete="off" value="colorloop">colorloop
					</label>
					<label class="btn btn-primary w-100">
						<input type="radio" name="effect" autocomplete="off" value="trail">trail
					</label>
				</div>
			</div>
		</div>
	</form>
</div>

<!-- js -->
<script src="https://code.jquery.com/jquery-3.3.1.slim.min.js" integrity="sha384-q8i/X+965DzO0rT7abK41JStQIAqVgRVzpbzo5smXKp4YfRvH+8abtTE1Pi6jizo" crossorigin="anonymous"></script>
<script src="https://cdnjs.cloudflare.com/ajax/libs/popper.js/1.14.3/umd/popper.min.js" integrity="sha384-ZMP7rVo3mIykV+2+9J3UJ46jBk0WLaUAdn689aCwoqbBJiSnjAK/l8WvCWPIPm49" crossorigin="anonymous"></script>
<script src="https://stackpath.bootstrapcdn.com/bootstrap/4.1.3/js/bootstrap.min.js" integrity="sha384-ChfqqxuZUCnJSK3+MXmPNIyE6ZbWh2IMqE241rYiqJxyMiZ6OW/JmZQ5stwEULTy" crossorigin="anonymous"></script>
<script>
// https://codeburst.io/throttling-and-debouncing-in-javascript-b01cad5c8edf
const throttle = (func, limit) => {
  let lastFunc
  let lastRan
  return function() {
    const context = this
    const args = arguments
    if (!lastRan) {
      func.apply(context, args)
      lastRan = Date.now()
    } else {
      clearTimeout(lastFunc)
      lastFunc = setTimeout(function() {
        if ((Date.now() - lastRan) >= limit) {
          func.apply(context, args)
          lastRan = Date.now()
        }
      }, limit - (Date.now() - lastRan))
    }
  }
}

var huerange = document.getElementById("huerange");
var satrange = document.getElementById("satrange");
var valrange = document.getElementById("valrange");

function updateBackground() {
	var hue = huerange.value;
	satrange.style.background = "linear-gradient(to right,#FFF,hsl(" + hue + ",100%,50%))";
	var sat = satrange.value;
	valrange.style.background = "linear-gradient(to right,#000,hsl(" + hue + ",100%," + (100 - sat/2) + "%))";
}

function changeColor() {
	sendState({
		"brightness" : valrange.value,
		"color" : {
			"h": huerange.value,
			"s" : satrange.value
		}
	});
}

huerange.addEventListener("input", updateBackground);
satrange.addEventListener("input", updateBackground);
var throttledChangeColor = throttle(changeColor, 500);
huerange.addEventListener("input", throttledChangeColor);
satrange.addEventListener("input", throttledChangeColor);
valrange.addEventListener("input", throttledChangeColor);

var huerangeBackground = "linear-gradient(to right";
for (var i =0; i <= 359; i++) {
	huerangeBackground += ",hsl(" + i + ",100%,50%)";
}
huerangeBackground += ")";
huerange.style.background = huerangeBackground;

updateBackground();

$('input[type=radio][name=state]').change(function() {
	sendState({"state":this.value});
});

$('input[type=radio][name=effect]').change(function() {
	sendState({"effect":this.value});
});

function updateRadio(name, value) {
	var inputs = document.getElementsByName(name);
	for (let input of inputs) {
		if (input.value === value) {
			input.checked = true;
			input.parentElement.classList.add("active");
		} else {
			input.parentElement.classList.remove("active");
		}
	}
}

function handleStateObject(stateObj) {
	console.log(stateObj);
	$('.navbar-brand').text(stateObj.id);
	$('title').text(stateObj.id);
	updateRadio("state", stateObj.state);
	updateRadio("effect", stateObj.effect);
	var color = stateObj.color;
	huerange.value = color.h;
	satrange.value = color.s;
	valrange.value = stateObj.brightness;
	updateBackground();
}

function sendState(stateObj) {
	console.log("sending state ", stateObj);
	var json = JSON.stringify(stateObj);

	var xmlHttp = new XMLHttpRequest();
	xmlHttp.open("PUT", "light");
	xmlHttp.setRequestHeader('Content-Type', 'application/json');
	xmlHttp.send(json);
}

(function loadConfig() {
	var xmlHttp = new XMLHttpRequest();
	xmlHttp.onreadystatechange = function() {
		if(xmlHttp.readyState === XMLHttpRequest.DONE && xmlHttp.status === 200) {
			handleStateObject(xmlHttp.response);
		}
	}
	xmlHttp.open("GET", "light");
	xmlHttp.responseType = "json";
	xmlHttp.send();
})();
</script>
</body>
</html>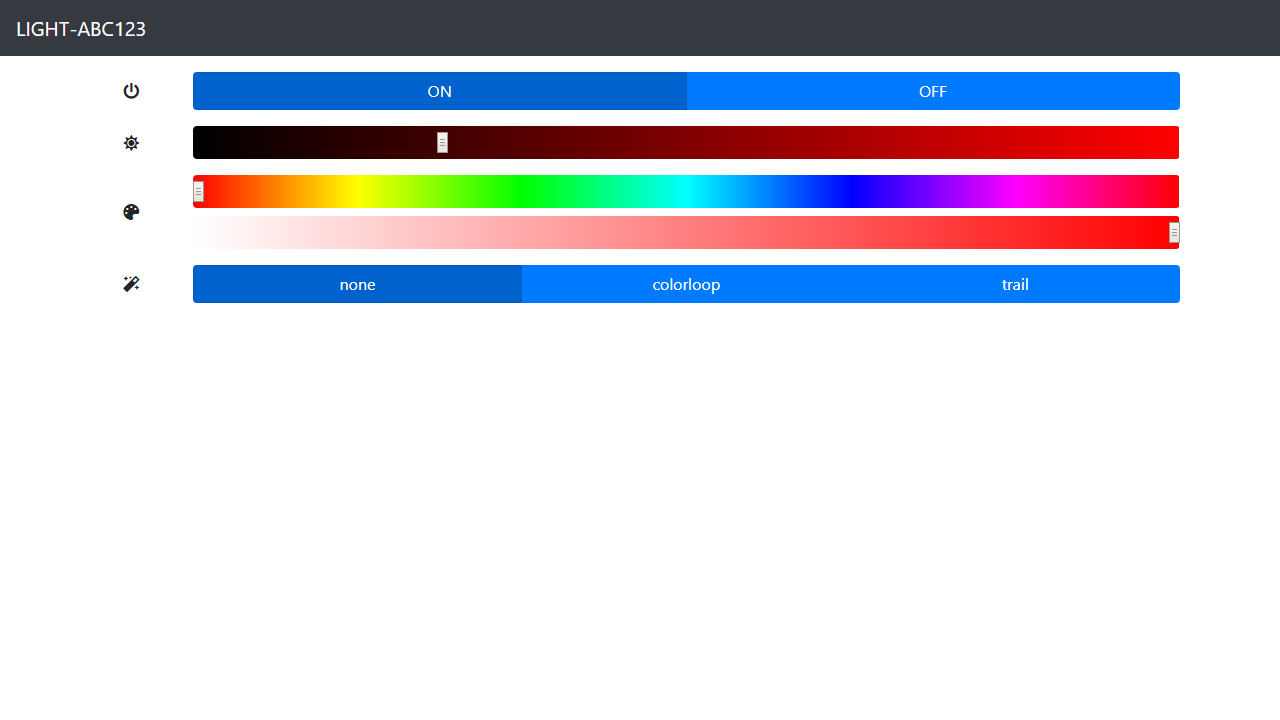
Effect: colorloop
Replace the following line in loop_led():
FastLED.showColor(currentColor); if (strcmp(effect, "none") == 0) {
FastLED.showColor(currentColor);
} else if (strcmp(effect, "colorloop") == 0) {
colorloop();
}Add the following function below the loop_led() function:
/**
  Logic for the "colorloop" effect. It overrides the hue of the current color by a adding a constantly incrementing hue offset.
  The summed hue value is automatically kept in the expected range of 0-255, due to the uint8_t type.
  see: https://github.com/FastLED/FastLED/wiki/FastLED-HSV-Colors#why-fastled-full-range-one-byte-hues-are-faster
*/
void colorloop() {
  static uint8_t colorloopHueOffset = 0;
  EVERY_N_MILLISECONDS(10) {
    CHSV colorloopColor = CHSV(++colorloopHueOffset + currentColor.h, currentColor.s, currentColor.v);
    FastLED.showColor(colorloopColor);
  }
}
Effect: trail
This effect makes use of the addressable nature of WS2812B strips. Up until this point, all FastLED operations had been applied to the entire strip. However, this one has varying brightness of LEDs at the same time.
Add one more else clause to the loop_led() function:
    } else if (strcmp(effect, "trail") == 0) {
      trail();
    }
Add the following function below the loop_led() function:
/**
  Logic for the "trail" effect. A colored dot with a fading trail moves along the LEDs, wrapping when it reaches the end.
*/
void trail() {
  static unsigned int pos = 0;
  EVERY_N_MILLISECONDS(10) {
    fadeToBlackBy(leds, NUM_LEDS, 8);
    FastLED.show();
  }
  EVERY_N_MILLISECONDS(100) {
    pos = ++pos % NUM_LEDS;
    leds[pos] = currentColor;
    FastLED.show();
  }
}
📡 Remote Access 📡
So far, we've been accessing our webserver while connected to the same network. In order to access this page remotely, there are a few options:
- VPN client/server
- SSH tunneling
- port forwarding (don't do this)
Port Forwarding
Port forwarding is the easiest way to allow integration with third party services since they would need to be able to hit your web server from outside of your network.
However, exposing an unprotected webserver to the open internet will put the device and its network at unnecessary risk ☠️. Don't do it!
MQTT
... a publish/subscribe, extremely simple and lightweight messaging protocol, designed for constrained devices and low-bandwidth, high-latency or unreliable networks. The design principles are to minimise network bandwidth and device resource requirements ...
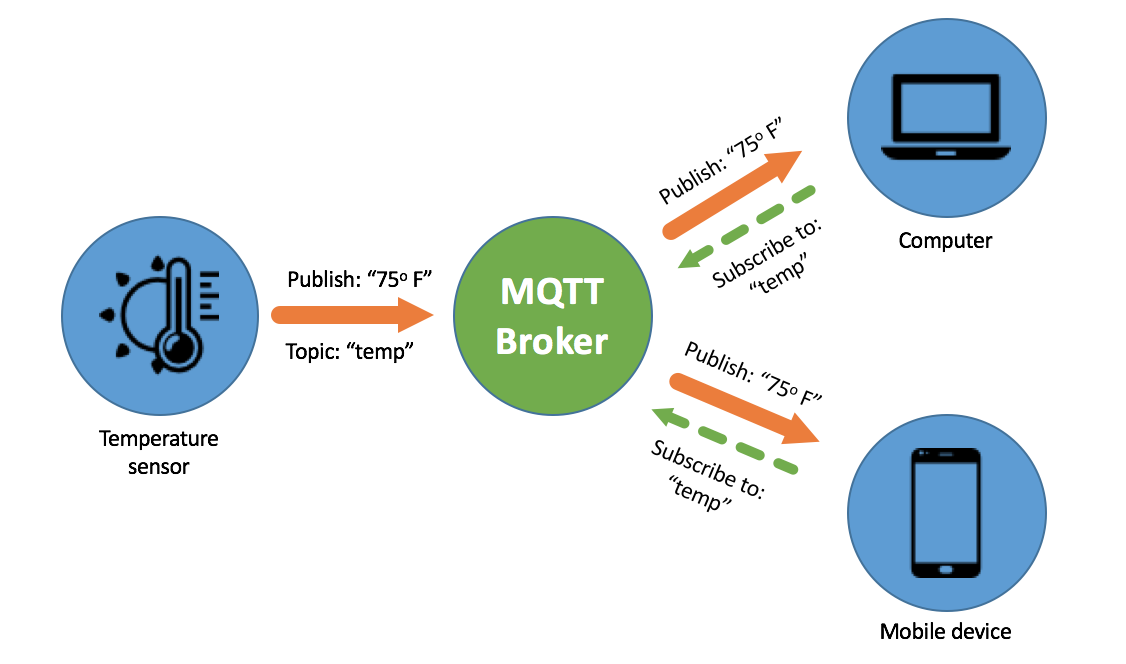
📷: https://www.appcelerator.com/blog/2018/03/api-builder-and-mqtt-for-iot-part-1/
Adafruit IO
Adafruit IO meets all of the criteria that I was looking for in a MQTT broker:
- free tier available
- cloud service platform
- MQTT API
- REST API
- encrypted communication channels available
- IFTTT integration
Create Feed
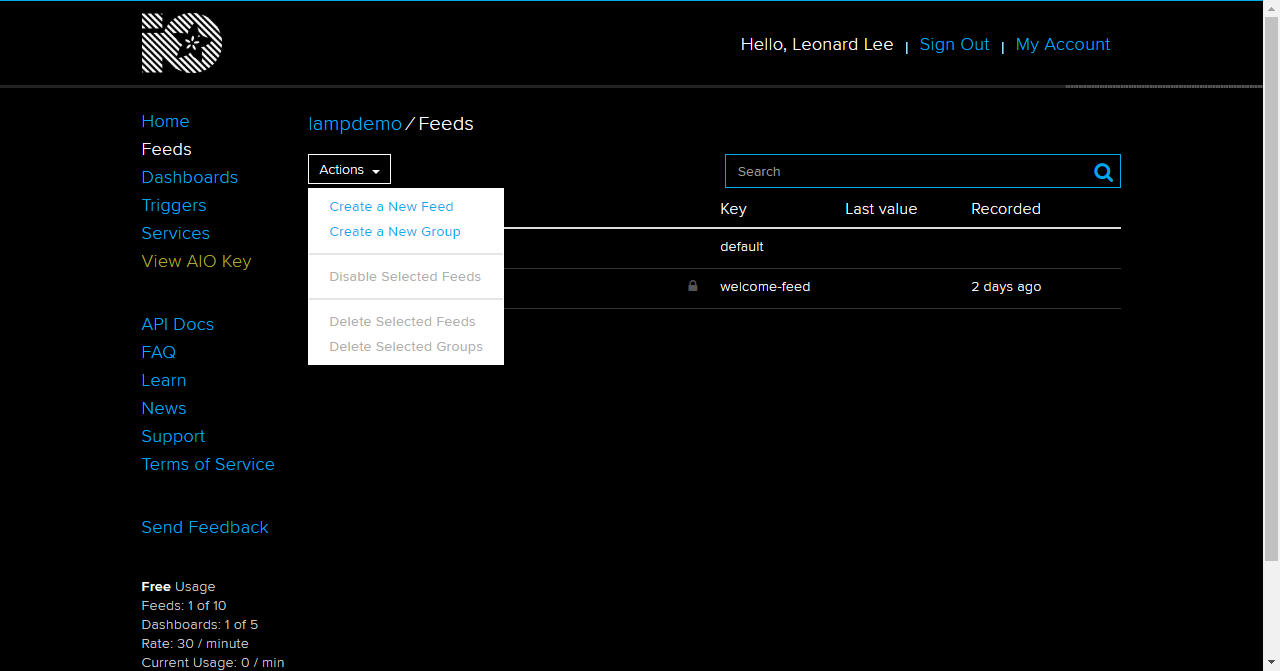
Feeds > Actions > Create a New Feed
Create a feed named "light-set"
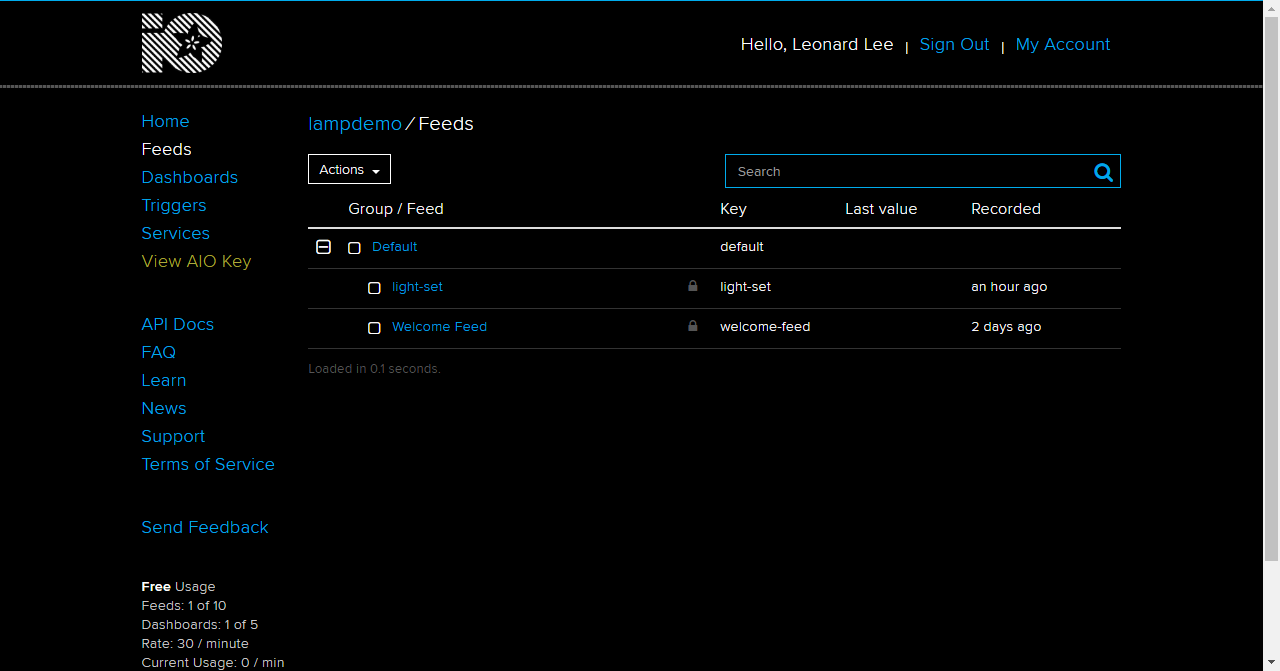
Click on "View AIO Key" on the left and make note of the username and key value
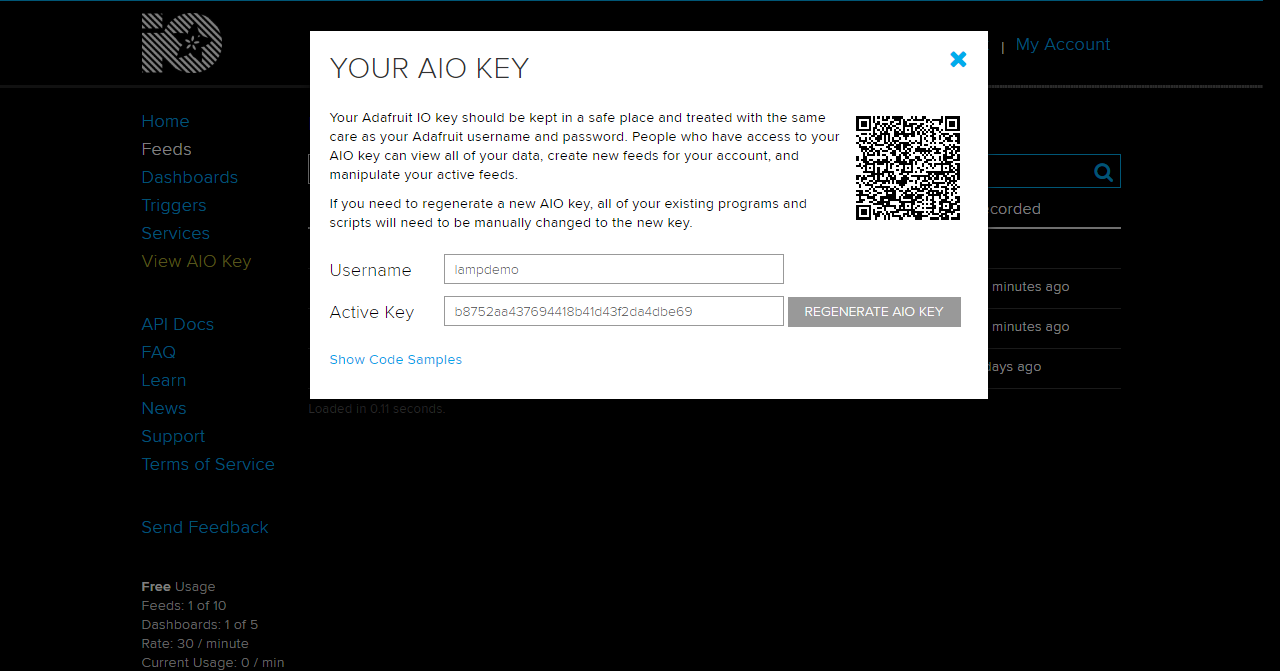
don't worry, I've since regenerated my key 😜
PubSubClient
- Install the PubSubClient library (by Nick O'Leary) using the Library Manager
- Add the PubSubClient include to the top:
#include <PubSubClient.h>
Add the following below the "HTTP server" global variables section, substituting your username and AIO key values:
// MQTT
#define MQTT_PORT 8883 // usually 1883 or 8883 (MQTT over TLS/SSL)
#define MQTT_SERVER "io.adafruit.com"
#define MQTT_USER "lampdemo"
#define MQTT_PASSWORD "b8752aa437694418b41d43f2da4dbe69"
#define MQTT_COMMAND_TOPIC "lampdemo/feeds/light-set" // topic for making changes to the current state
WiFiClientSecure wiFiClient;
unsigned long lastConnectAttempt = 0;
PubSubClient pubSubClient(wiFiClient);
Add the following to the setup() function, below the "HTTP server" section:
  // MQTT
  pubSubClient.setServer(MQTT_SERVER, MQTT_PORT);
  pubSubClient.setCallback(mqttCallback);
Add the following the the loop() function, below the "HTTP" section:
  // MQTT
  loop_mqtt();
Add the following functions to the bottom of the sketch and upload your sketch again
void loop_mqtt() {
  if (!pubSubClient.connected()) {
    unsigned long now = millis();
    if (now - lastConnectAttempt > 5000) {
      lastConnectAttempt = now;
      // Attempt to connect
      if (connectPubSub()) {
        lastConnectAttempt = 0;
      }
    }
  } else {
    // Client connected
    pubSubClient.loop();
  }
}

/**
   returns true if the MQTT connection attempt was successful; false otherwise
*/
boolean connectPubSub() {
  Serial.println("attempting MQTT connect");
  if (pubSubClient.connect(getIdentifier().c_str(), MQTT_USER, MQTT_PASSWORD)) {
    Serial.printf("MQTT connection established to %s:%d\n", MQTT_SERVER, MQTT_PORT);
    pubSubClient.subscribe(MQTT_COMMAND_TOPIC);
  }
  return pubSubClient.connected();
}

/**
  handle incoming MQTT message
*/
void mqttCallback(char* topic, byte* payload, unsigned int length) {
  Serial.printf("MQTT message arrived [%s]: ", topic);
  Serial.write(payload, length);
  Serial.println();

  if (strcmp(topic, MQTT_COMMAND_TOPIC) == 0) { // we only care about messages from the command topic
    handleJsonPayload((const char*) payload);
  }
}
Add Data to the Feed
Add some data to change the color:
{"color":{"h":180}}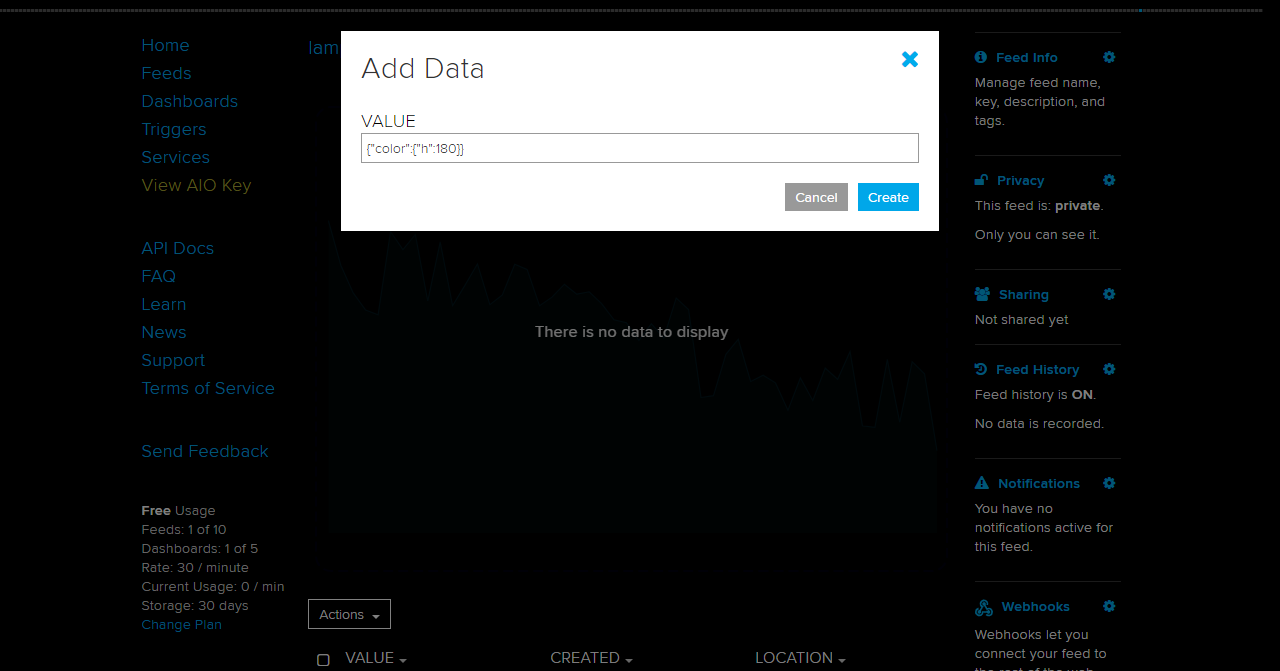
Feeds > light-set > Actions > Add Data
IFTTT
IFTTT stands for "if this, then that". It is a service that connects other services together based on rules/events that you define called applets. We will use it to connect Google Assistant and Alexa to Adafruit IO.
Connect to Adafruit IO
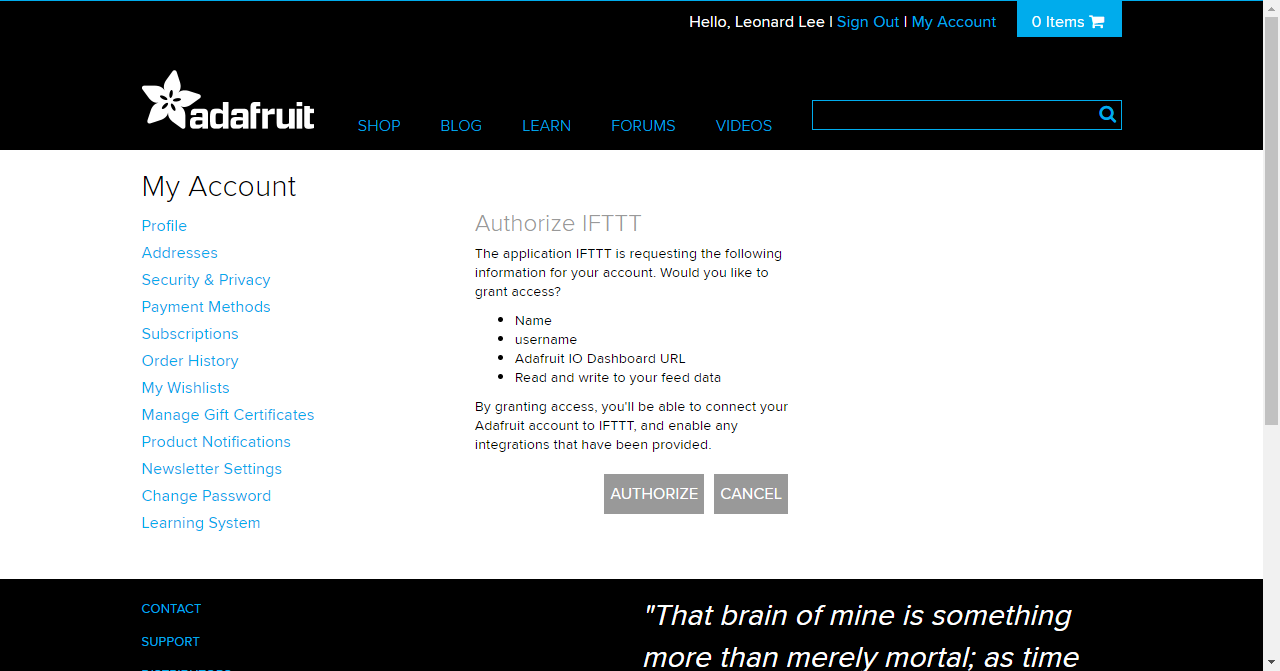
Go to https://ifttt.com/adafruit to connect IFTTT to Adafruit IO
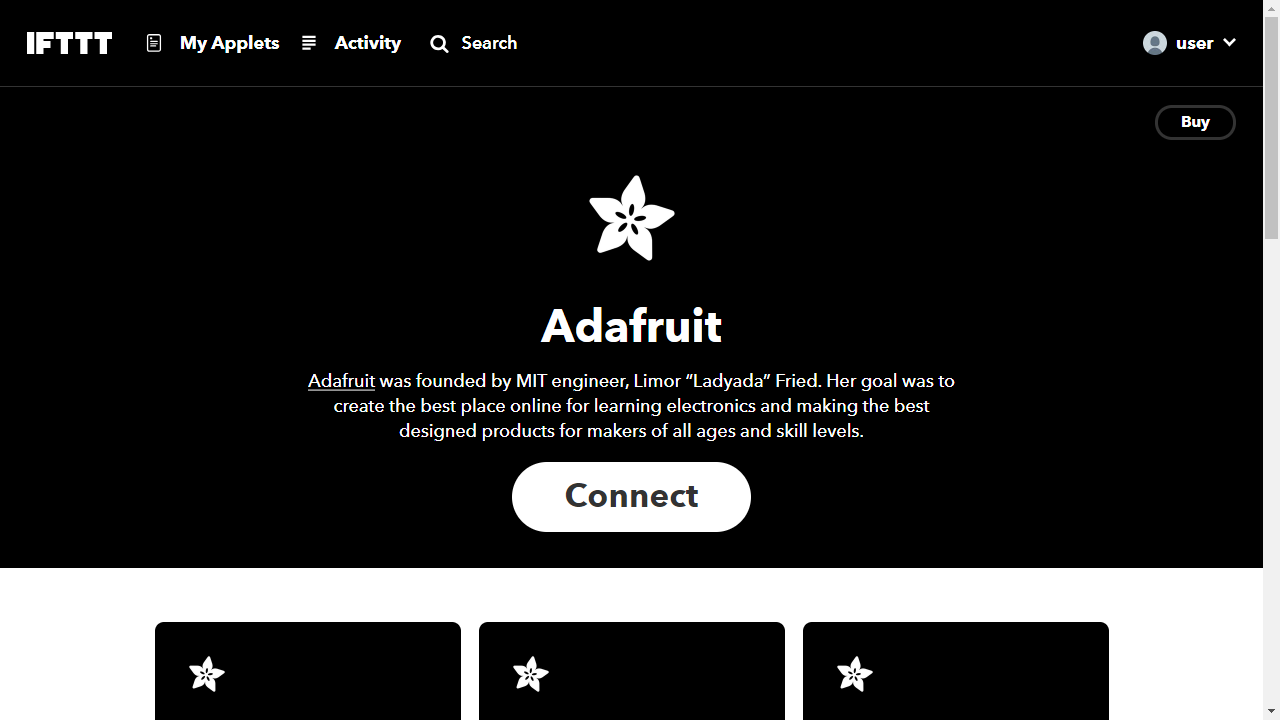
After clicking on Connect, you will see a screen asking you to authorize access to AIO
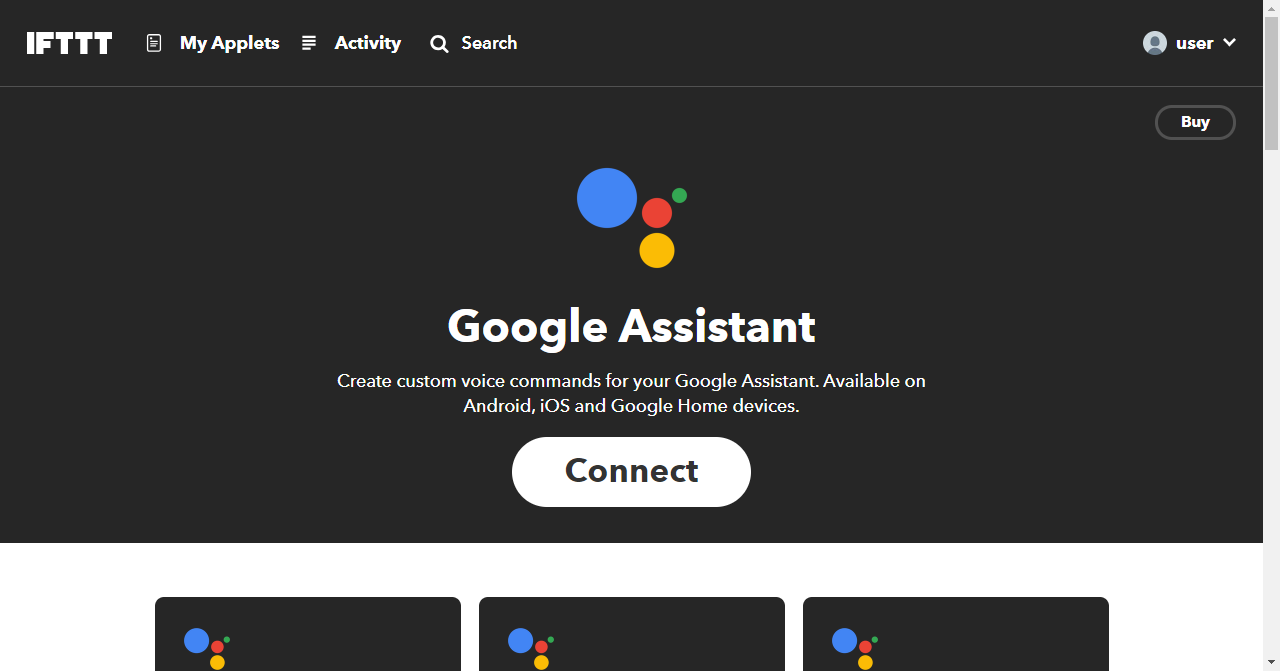
Connect to Google Assistant
Go to https://ifttt.com/google_assistant to connect IFTTT to Google Assistant
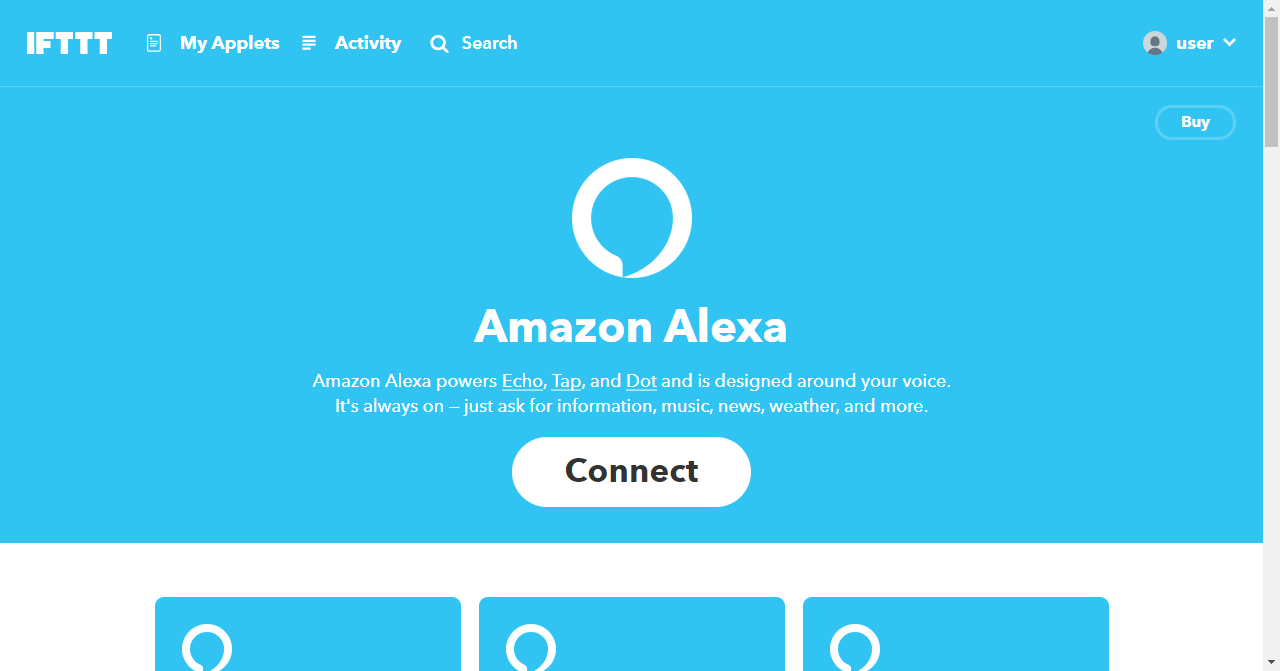
Connect to Alexa
Go to https://ifttt.com/amazon_alexa to connect IFTTT to Amazon Alexa
Create an Applet
My Applets > New Applet
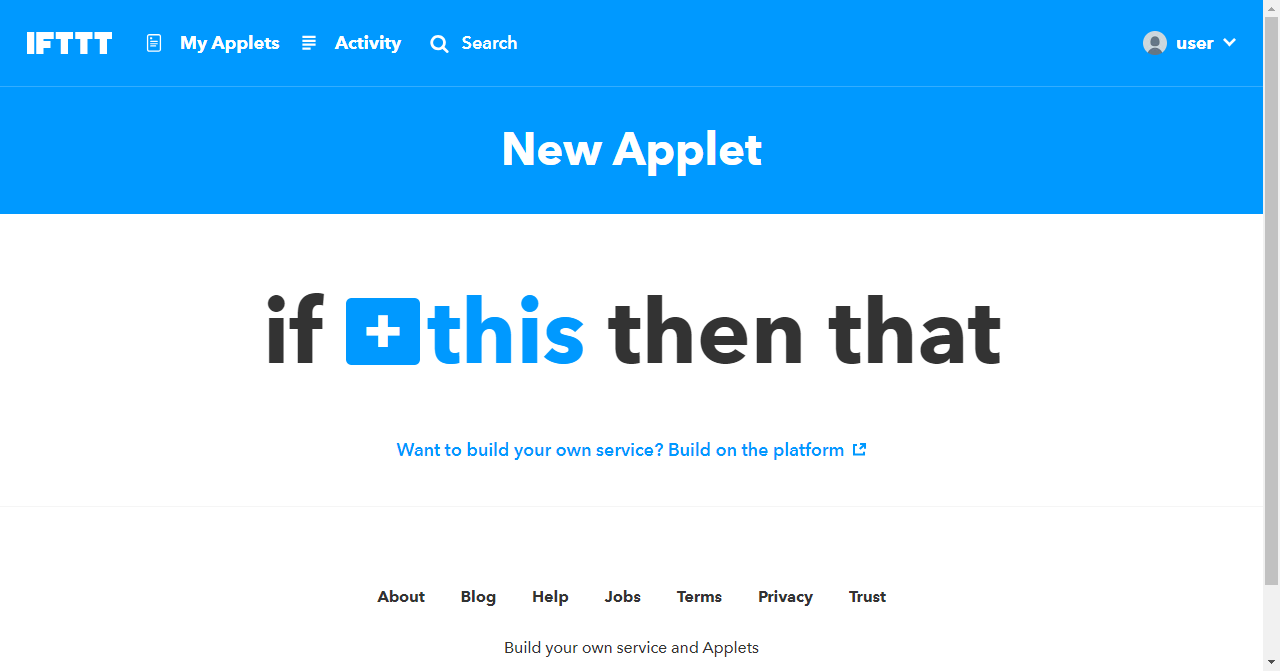
this
For the "this" part of the applet, we will select the Google Assistant service
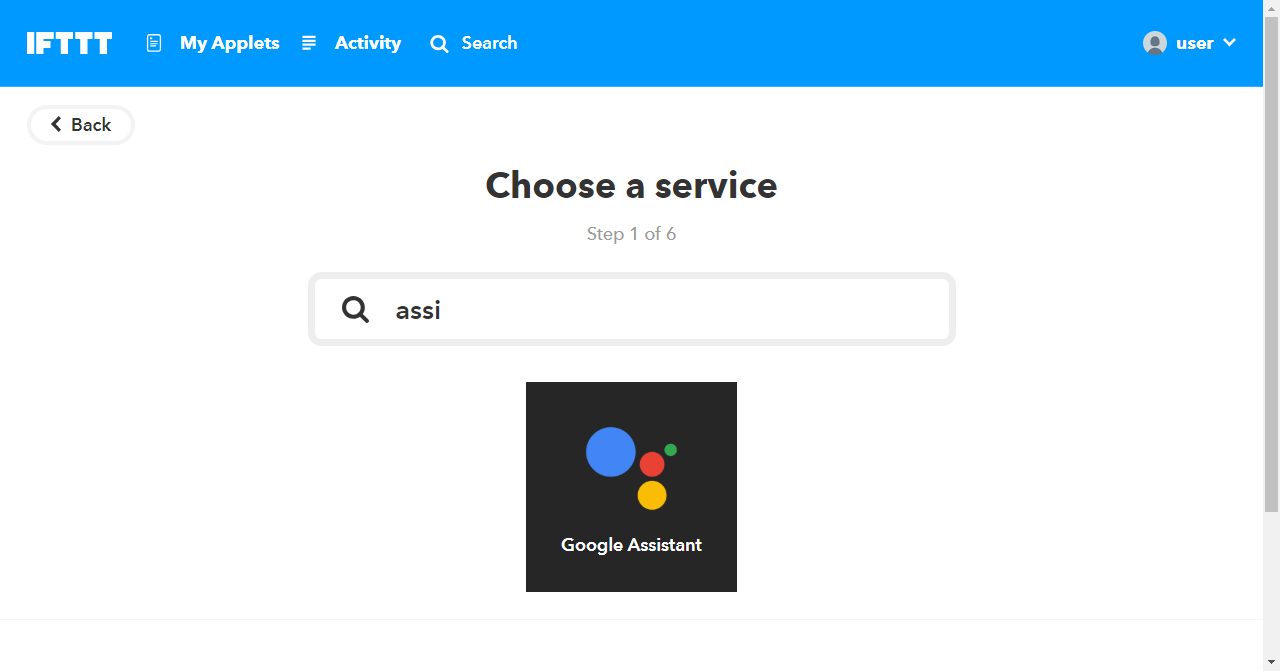
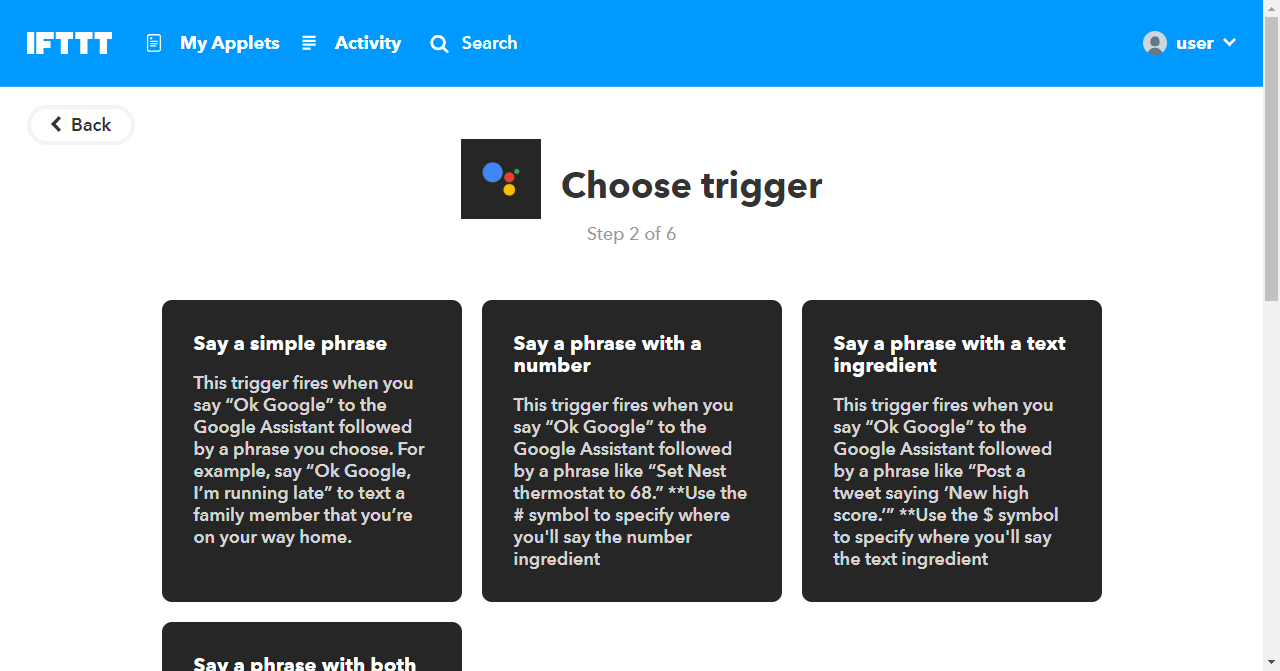
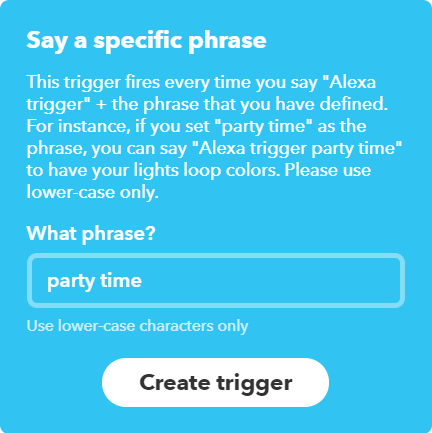
Choose the "Say a phrase with a number" trigger
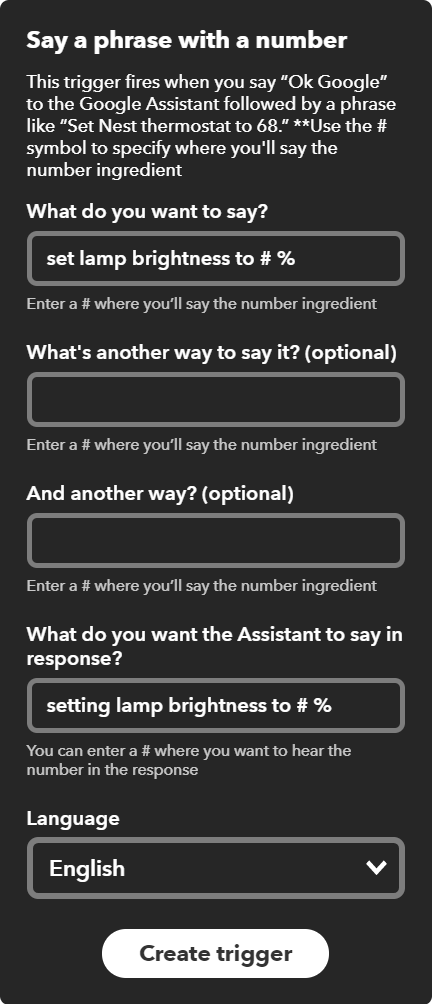
Fill out the form like so and click "Create trigger":
that
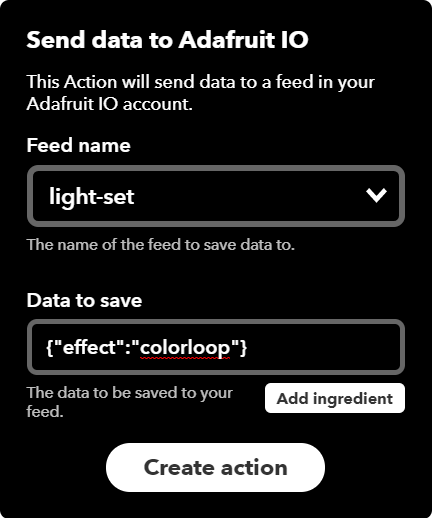
For the "that" part of the applet, we will select Adafruit
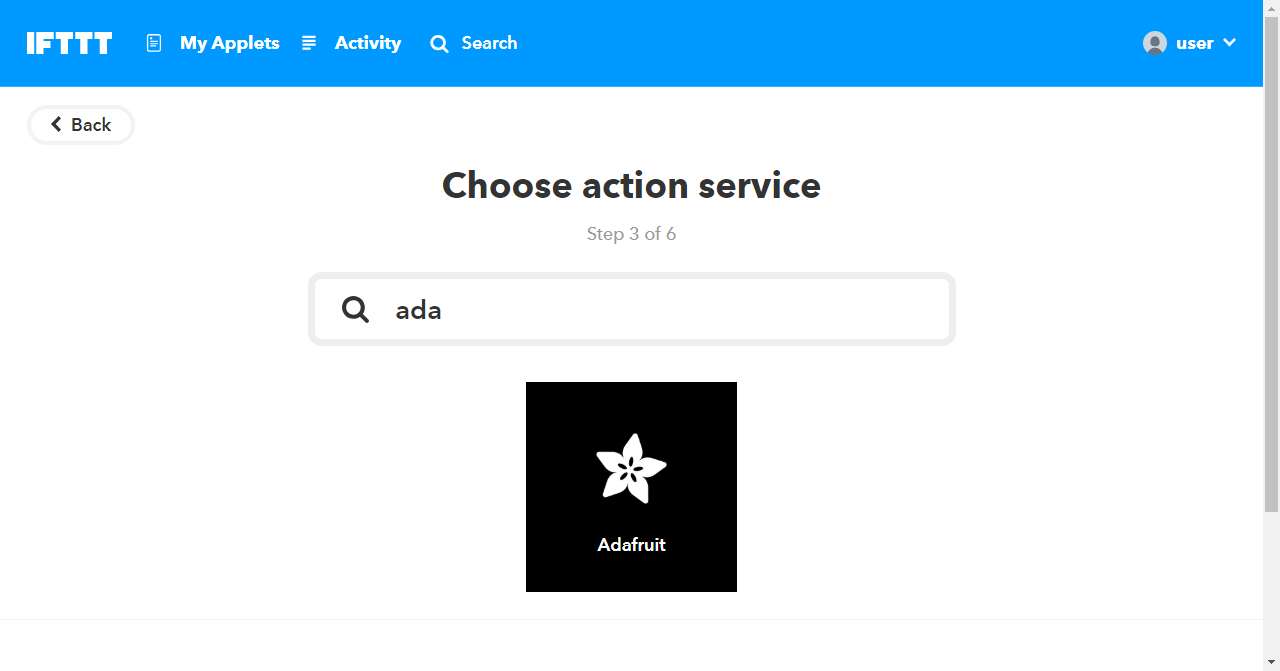
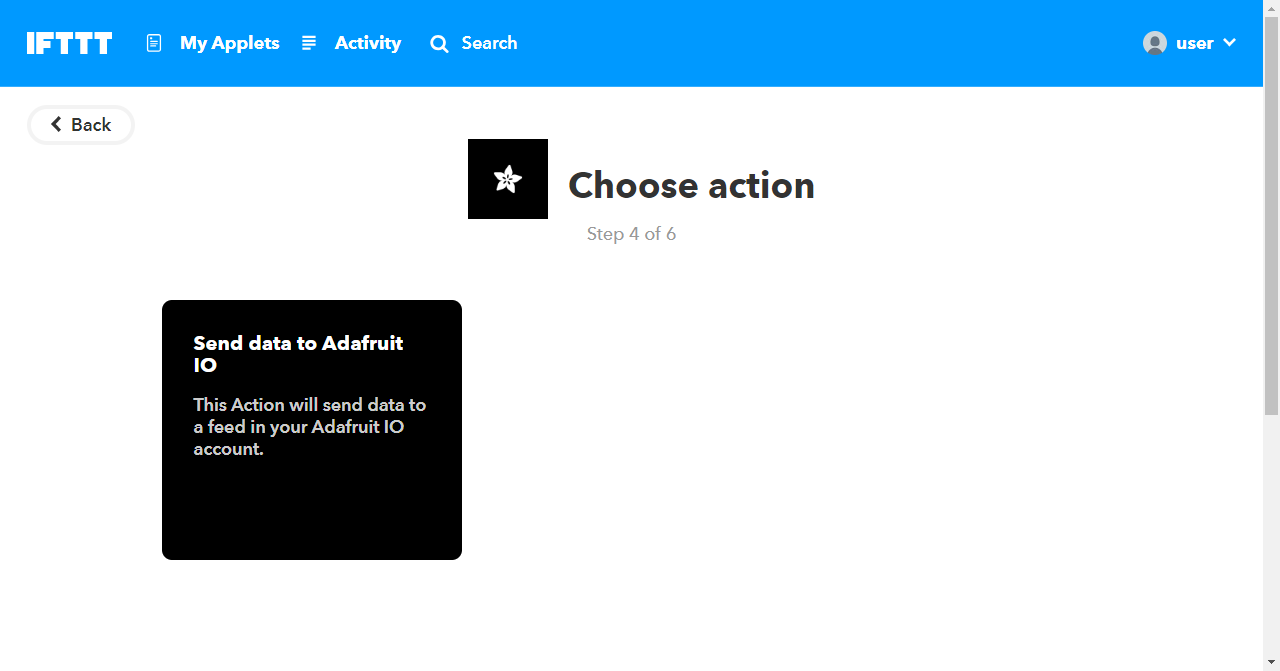
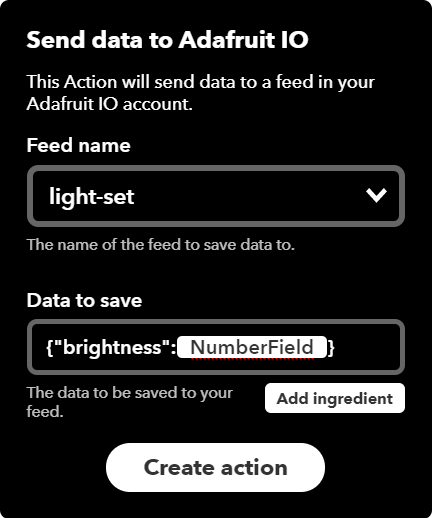
Fill out the form like so and click "Create action":
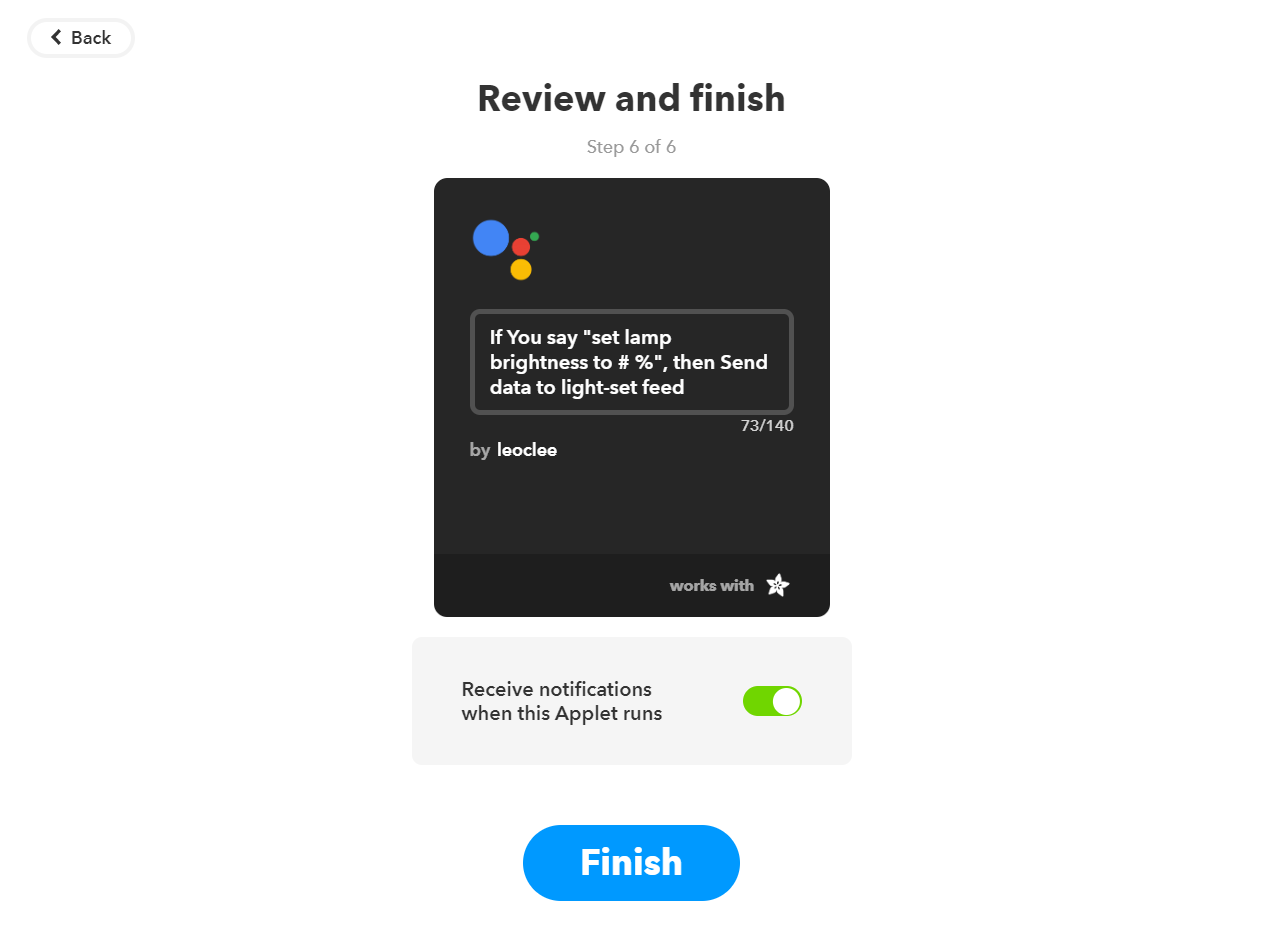
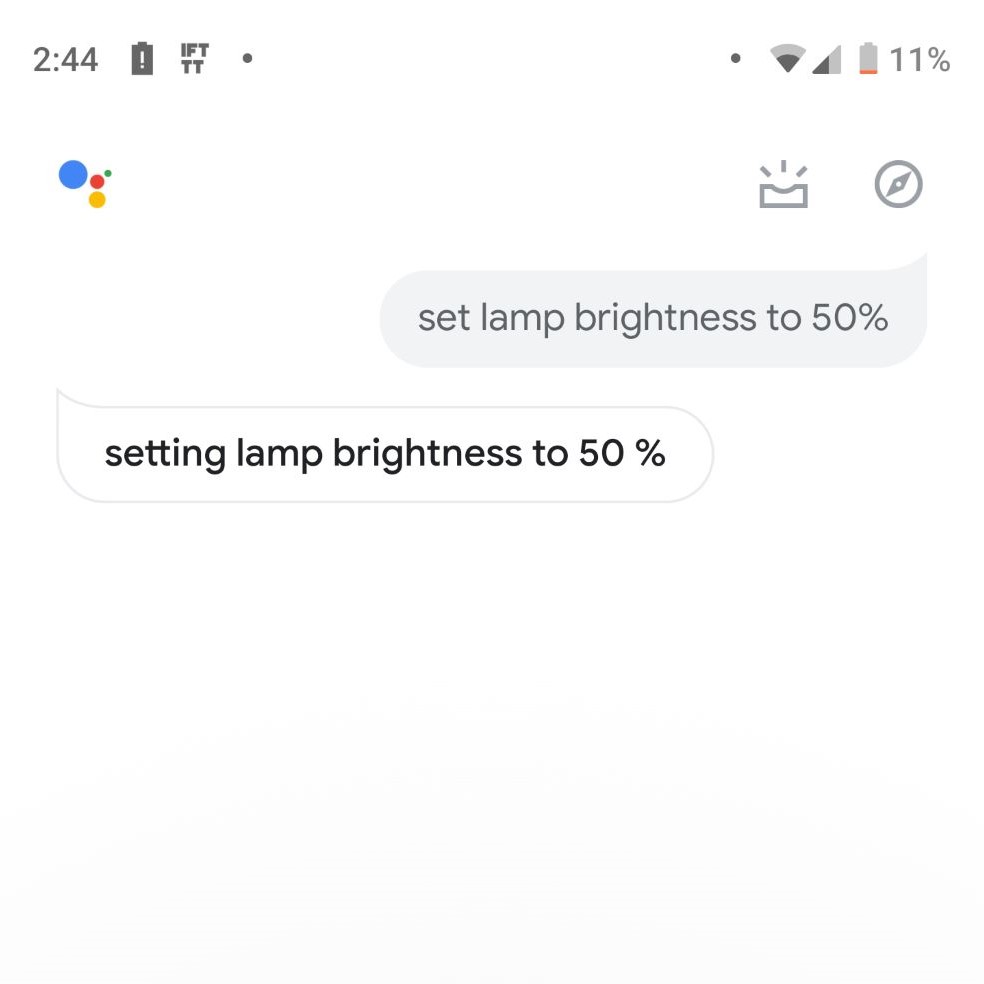
Let's try it out using the Google Assistant app
🎉 Party Time With Alexa 🎉
The setup for Alexa will be very similar
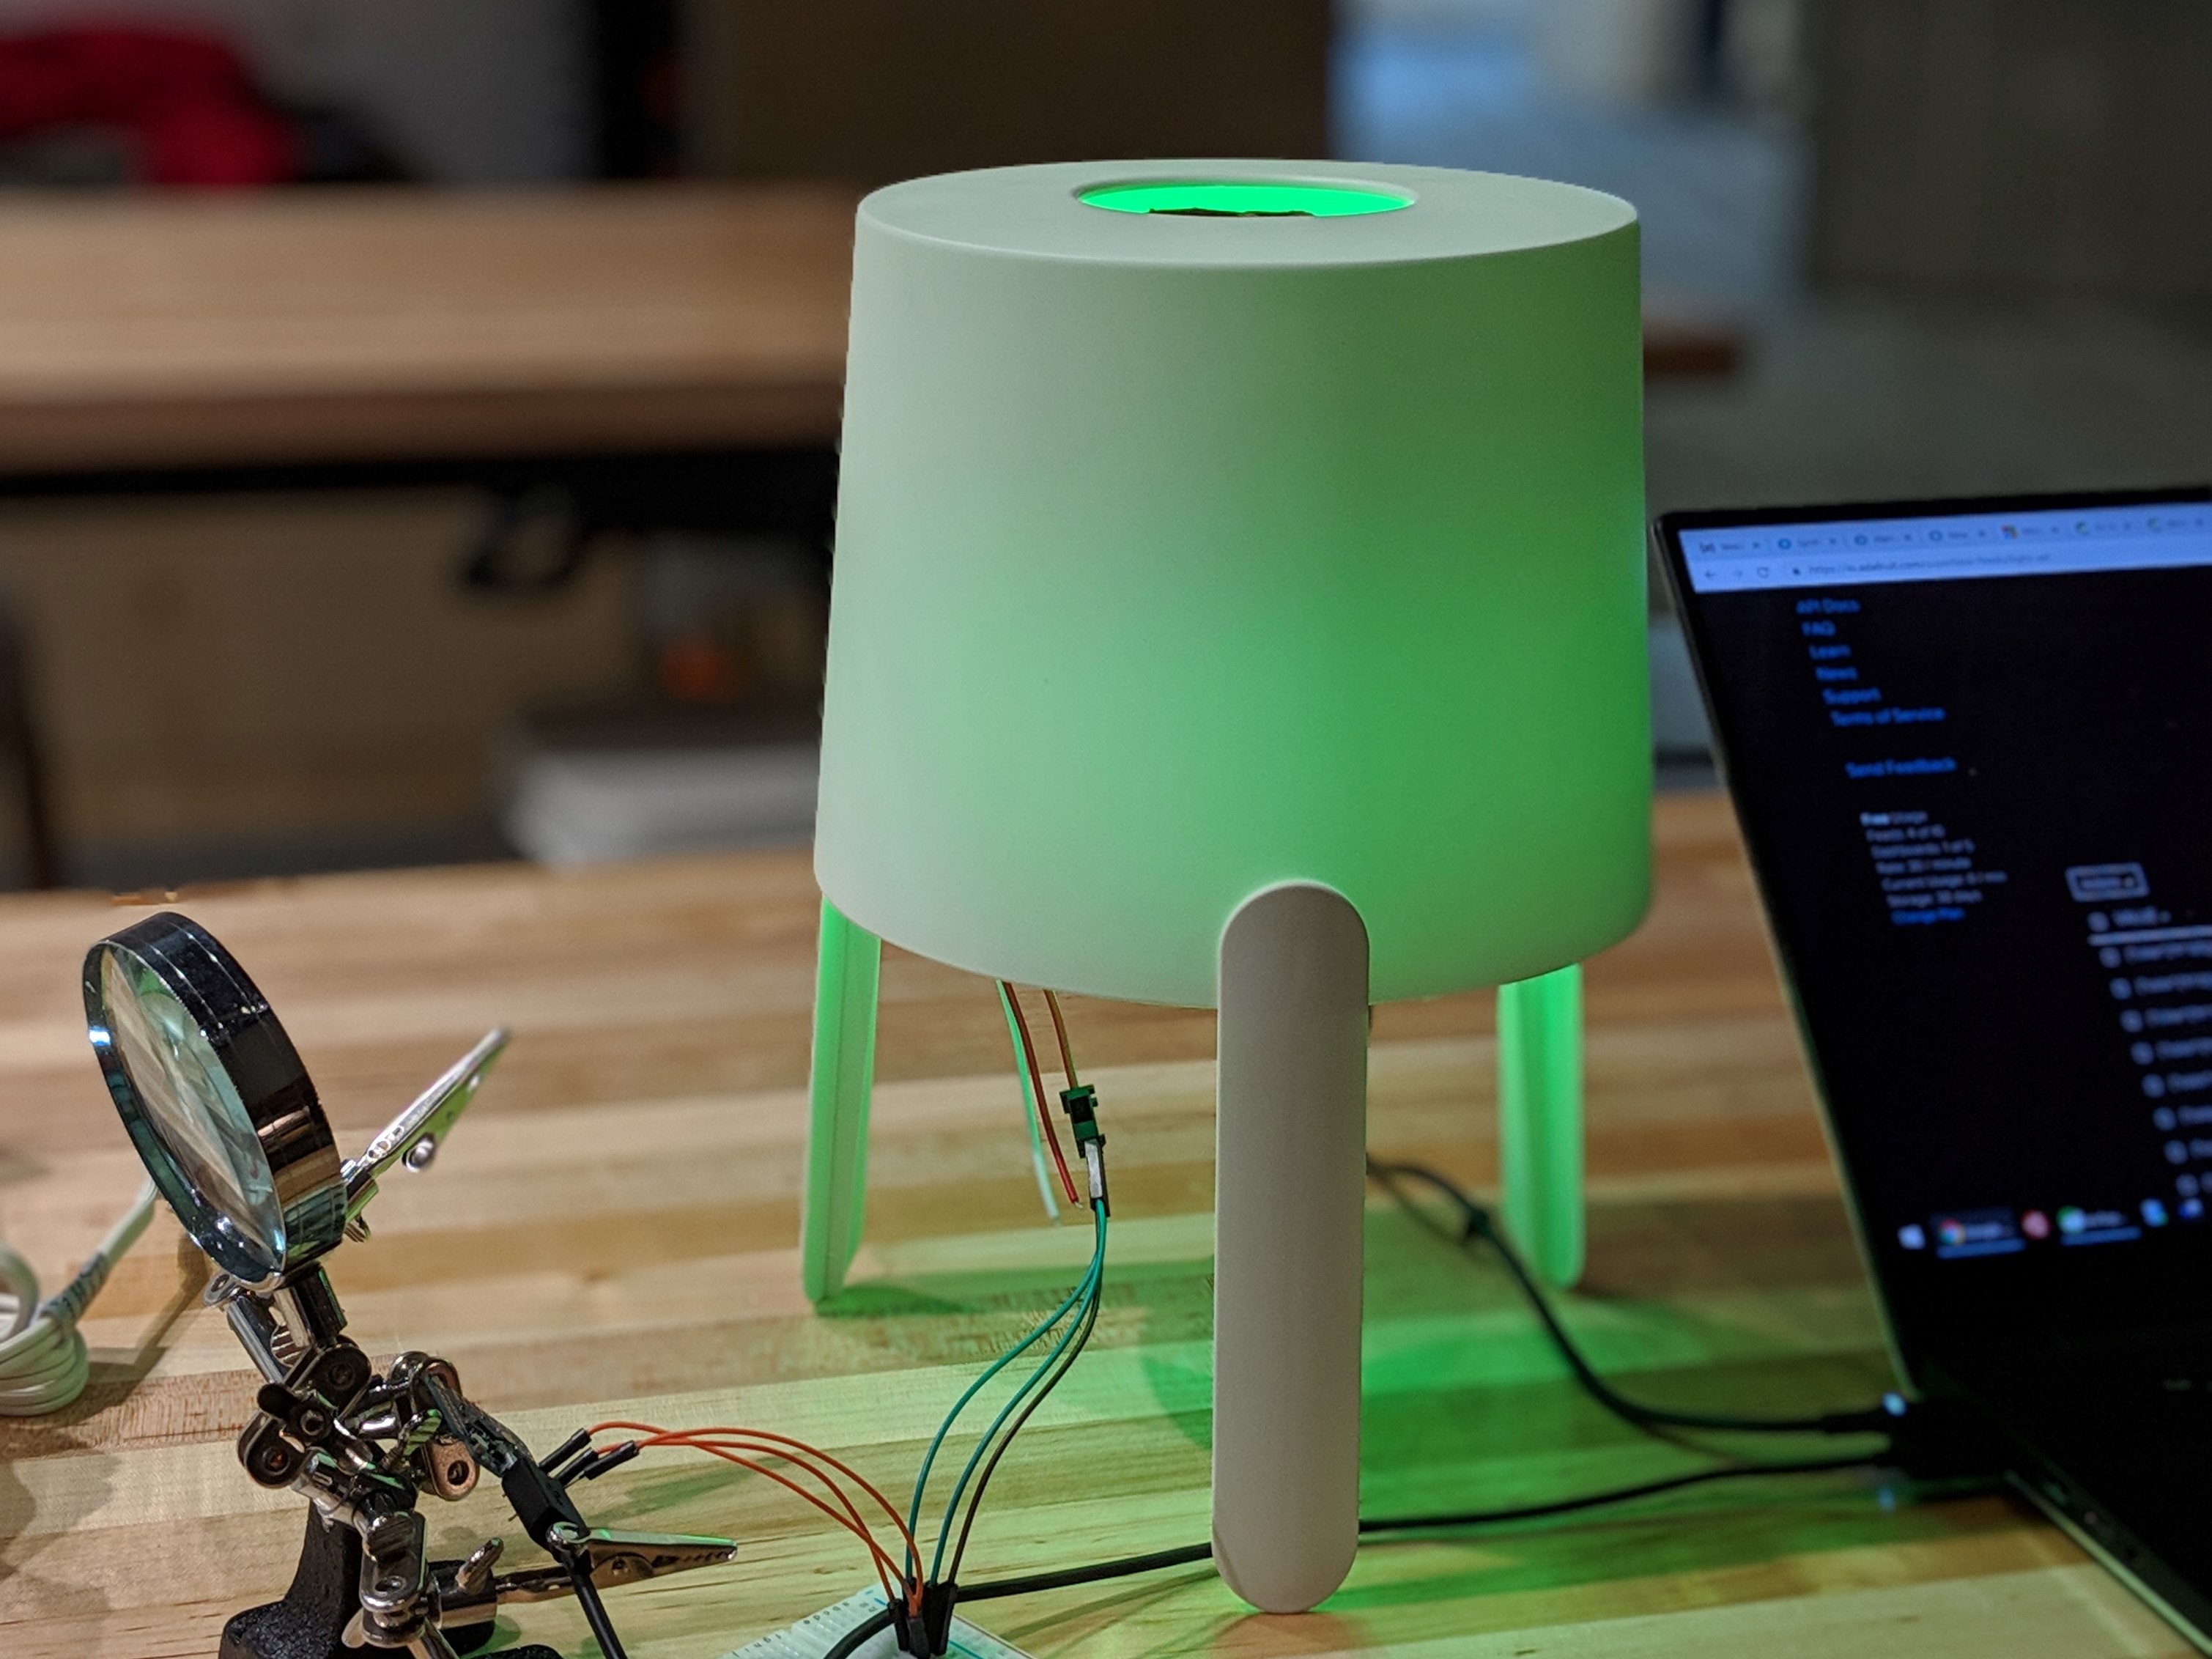
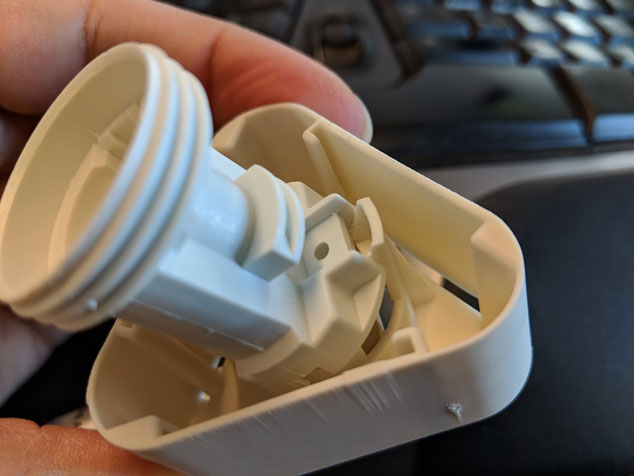
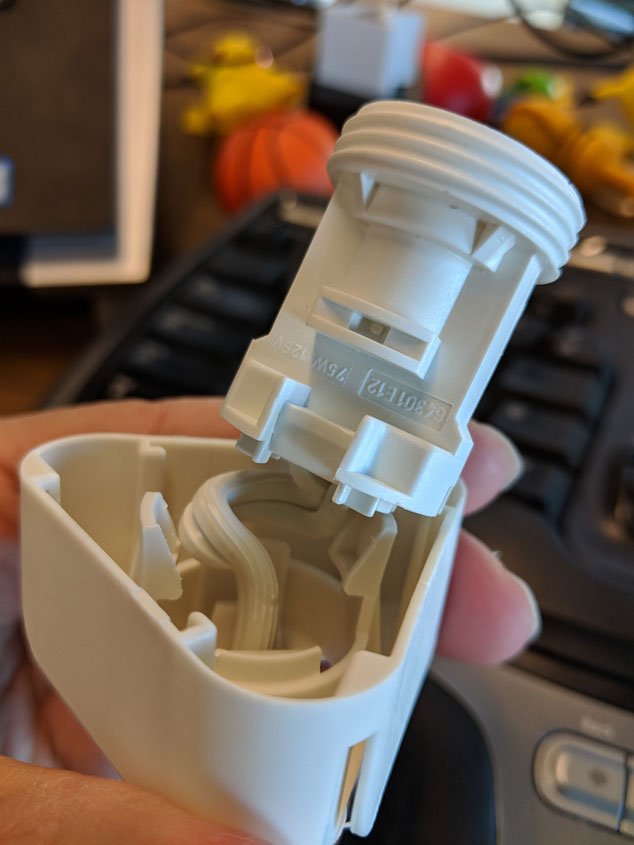
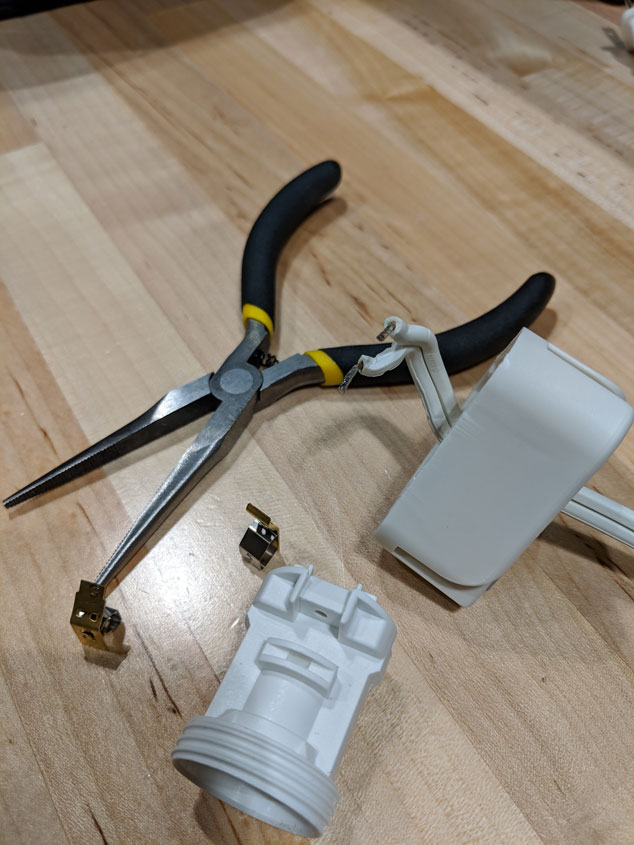
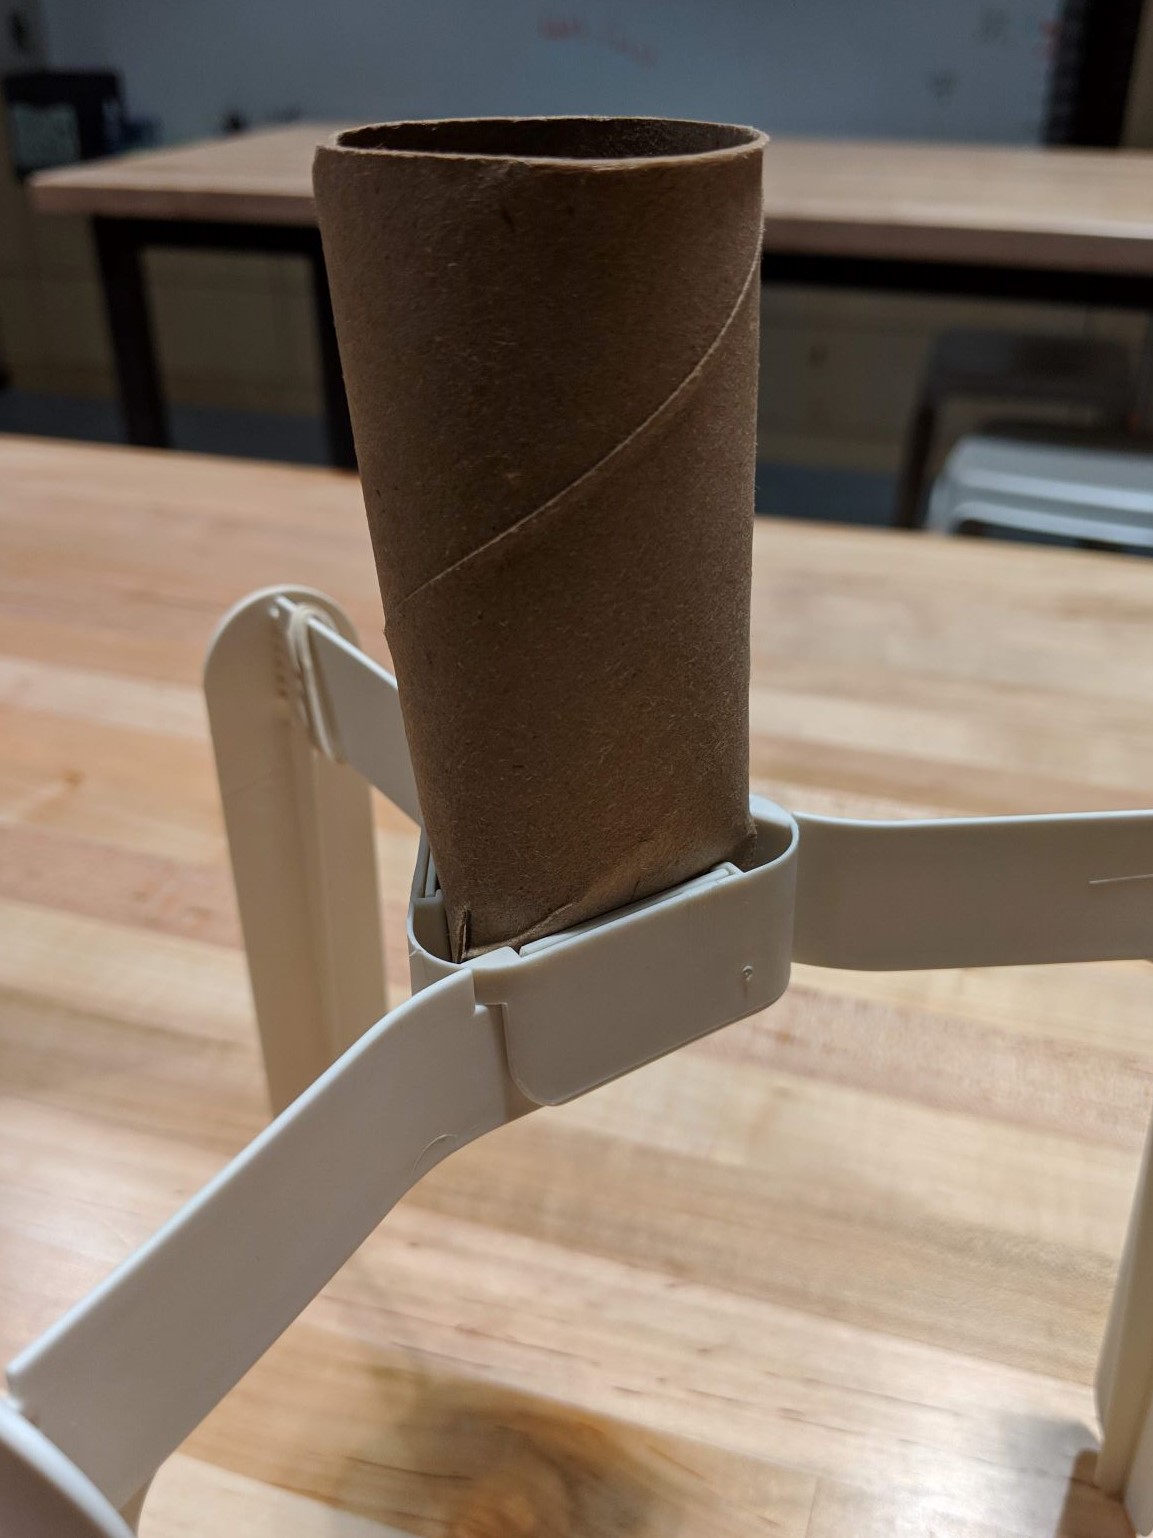
Lamp Assembly
Remove the socket from the base
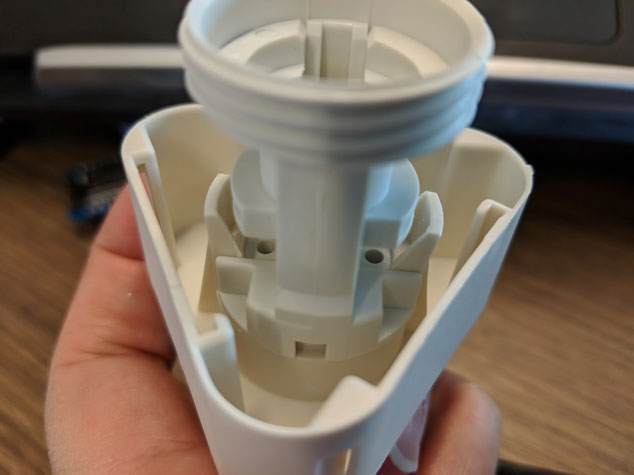
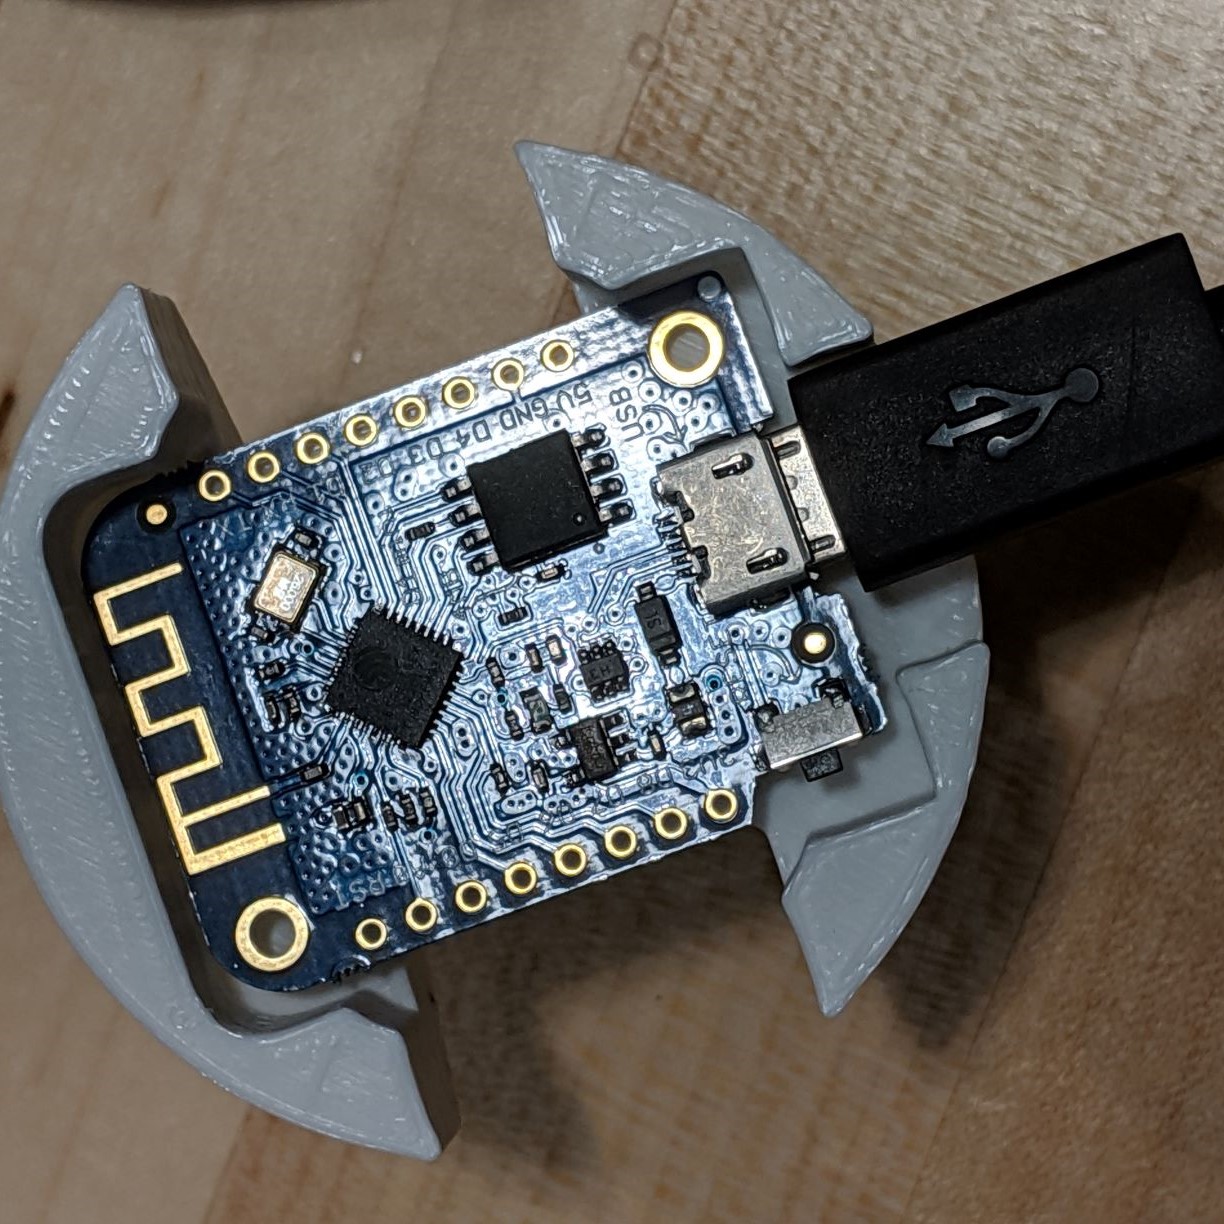
Secure the D1 mini using the included rubber band

Attach the legs
Using the cut guide, cut three 1" slits up the cardboard tube


Squeeze the bottom of the tube into a triangle shape that fits snugly into the base.
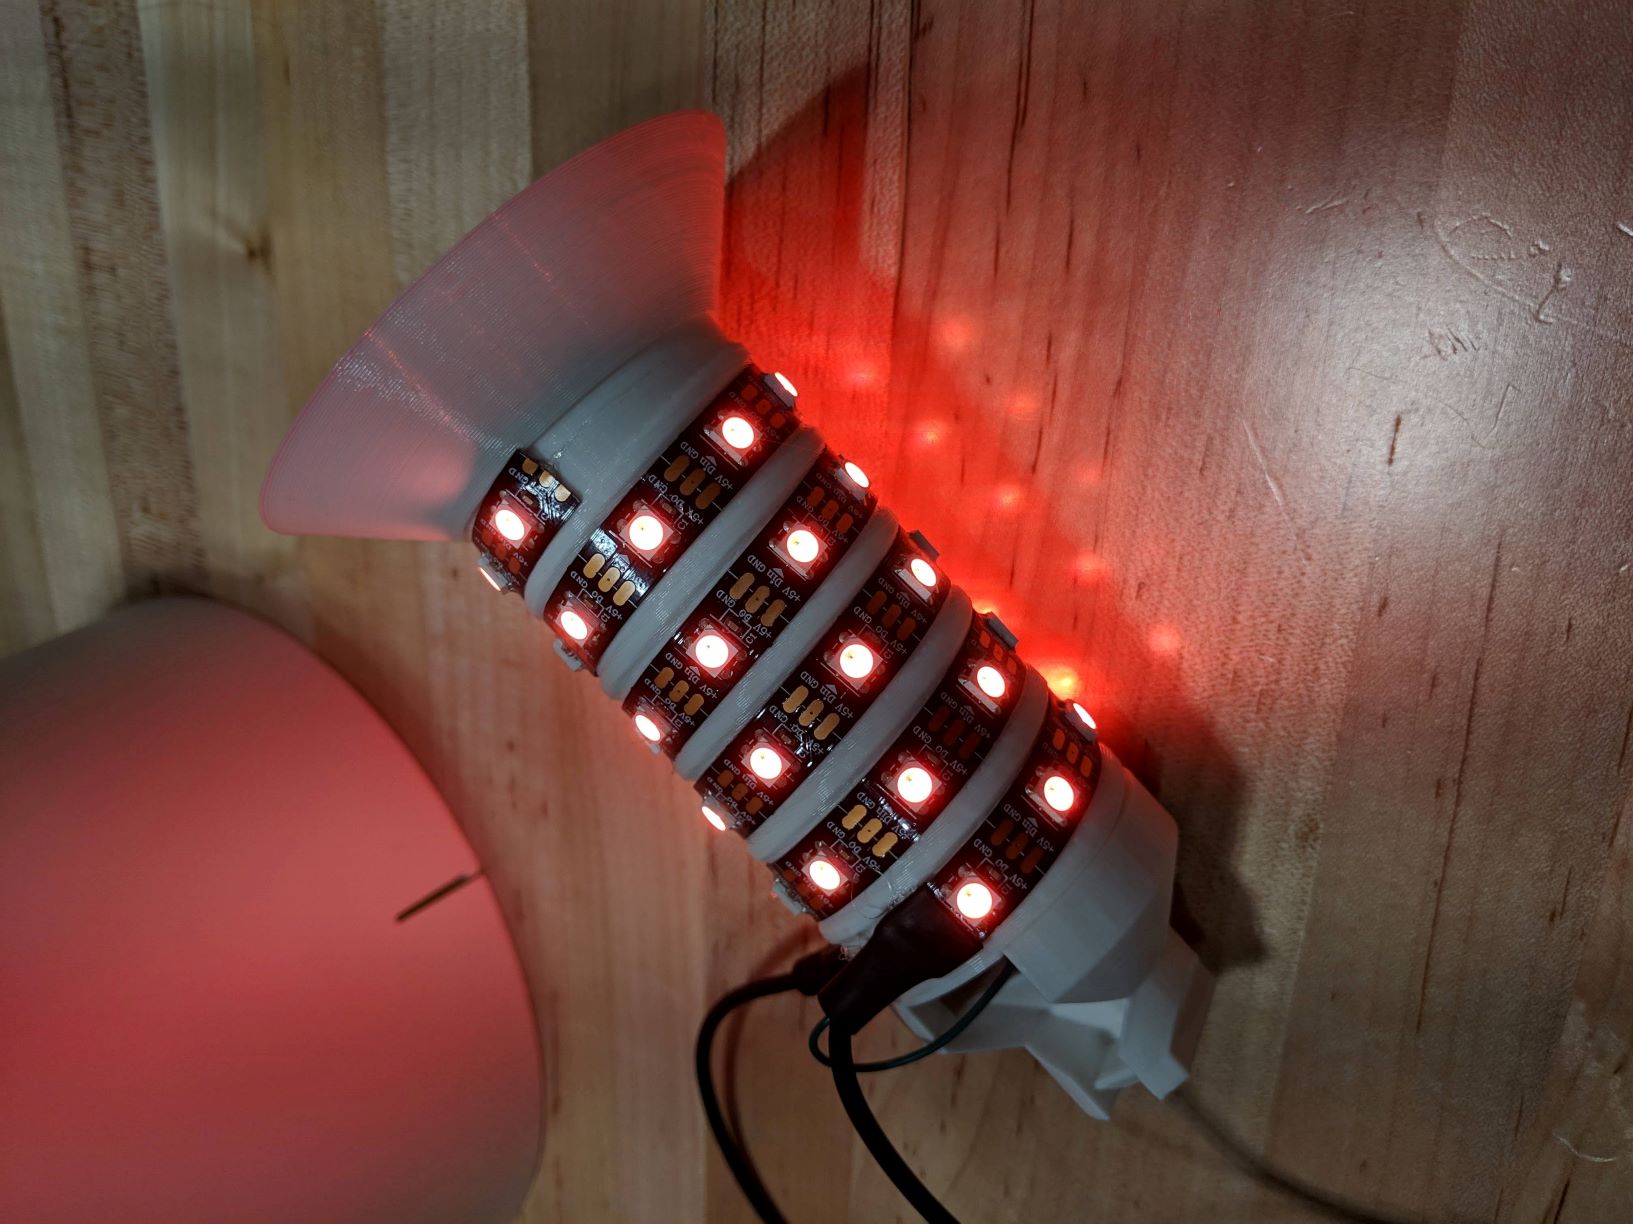
Wrap the LED strip around the tube and secure it using the adhesive backing, tape, hot glue, etc.
Place the lamp shade on the base
Next Steps: Replace the Cardboard Tube
Next Steps: WiFiLight
https://github.com/leoclee/WiFiLight
- OTA updates
- fade transition between colors
- WebSockets - low latency communication; changes from multiple users are seen by all connected clients
- state save - handles power loss
- additional effects
- WiFi reset
- diagnostic info from browser
Next Steps: More LEDs
- Get a longer strip or extend your existing strip
- Get a larger 5V power supply to meet the current demand
- Rewire to bypass the D1 mini's fuse
The D1 mini has a 500 mA fuse that limits the current that the 5V pin can supply
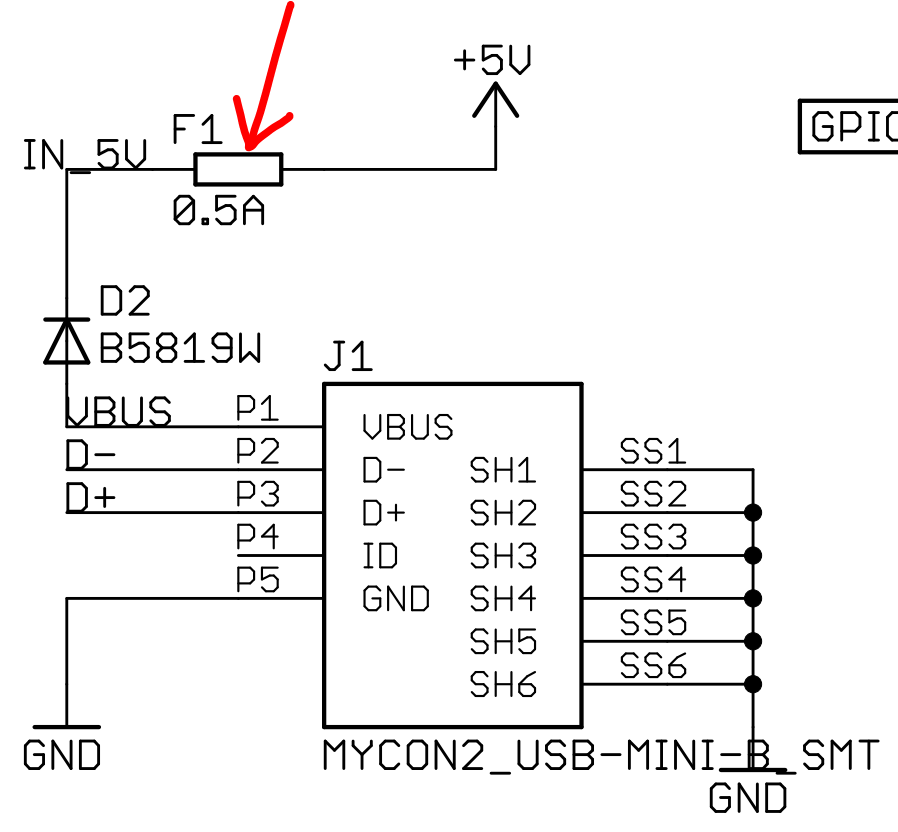
https://wiki.wemos.cc/_media/products:d1:sch_d1_mini_v3.0.0.pdf
Next Steps: Other Lamp Enclosures
The TVÄRS lamp was chosen as the base due to its low cost ($4 USD) and ease of modding, allowing us to focus on the electronics and software. The same electronics components can be used in almost any lamp or enclosure you can imagine, whether they are premade like the TVÄRS, handmade, 3D printed, or laser cut.
Next Steps: Other Project Ideas
- notification light: blink or change color on events (e.g., new email/tweets, stock alerts)
- audio visualization: add a microphone for sound/music reactive lighting
- nightlight: add a photoresistor to automatically adjust brightness
- clock: synch with NTP and gradually fade from one color to another over each hour
- long distance friendship lamps